December Meeting

A reminder of the information for this month’s meeting – it is coming up fast!


Wednesday December 9

7-9pm

Earthly Goods (4115 – 106 Street in Edmonton, Alberta)

Christmas Swap (optional) – “Something Innovative with Christmas Fabric”

Refreshments and Snacks


Agenda found here: Agenda EMQG Dec. 9, 2015.

November Meeting update

Due to the holiday this week, there has a been a change in time and location for this month’s meeting.

Different Meeting Time and Place

Thursday November 12

7-9pm

Dunluce School

11735-162 Ave.

We will return to meeting at Earthly Goods Quilting from 7-9 on December 9th.

December’s Meeting- Regular date and place.

Pillow Swap

Recently our guild participated in a pillow swap with another Canadian guild in Halifax.  Here is a look at the pillows that our members sent out for the swap!

image1 image2 image3 image4 image5 image6 image7 image1 image2 image3 image4 image5 image6 image7 image8

The swap was a great success – the pillows we received will be coming soon!  Next meeting is this Wednesday (Sept 9th), 7-9pm at Earthly Goods Quilting.

Block of the Month – Assembly

img066crppedThis is a little late coming, but better late than never. This is a post for a simple way to put you block of the month blocks together into a quilt top. Please feel free to use your imagination and come up with something totally different than I have posted. Also, please forgive my lack of artistic talent in sketching out my ideas, apparently the creative part of my brain does not extend to drawing.

Materials:
15 – 2.5 x 12.5″ strips of background fabric
2 – 2.5 x 44.5″ strips of background fabric (you will need to piece to pieces of background together to make this strip)
2 – 2.5 x 40.5″ strips of background fabric
4 – 2.5 x 2.5″ squares of print fabric.

Assembly:
1. Find the arrangement of the blocks that appeals to you on your design board.
2. Take the middle square of each row and add a 2.5 x 12.5 strip of background to 2 sides (opposite of each other). Press the seams.
3. Attach the adjacent blocks to the strips of background fabric on the middle block for each row. You will now have 3 rows that consist of (Block – background – block- background – block).
4. Assemble the 2 rows by attaching 2.5x 2.5 blocks of print to 2.5 x 12.5″ background strips in the following order: (background-print-background-print-background) Press the seams.
5. Now you can sew your rows together – blocks, strip, blocks, strip, blocks (like the above picture).
6. Add your boarders (long strips of background fabric).

You are now ready to baste and quilt.

We look forward to seeing everyone’s creations at the upcoming June meeting!

Block of the Month – Hexagons

This is our last skill builder block of the month – yay for making it to the end!  Next month is assembly and I am looking forward to seeing the finished product from everyone!

Alright so for this month we are doing hexagons – the easy way!

IMG_2745

Materials:

24 pieces of fabric 2.5 x 5.5″ (make sure for most colours you have the pieces in multiples of 2)

Directions.

1. Take a 2.5 x 5.5″ strip of fabric and using the 60 degree line on your mat or ruler cut the end off the strip from the corner.

IMG_2737

2. Repeat this on the other side to give yourself a 1/2 a hexagon (remember to cut the second side in the opposite direction so you do NOT end up with a paralellelogram!)

IMG_2738

3. On your design board (or the floor, whatever works), arrange your 1/2 hexagons into a square of 3 x 4 hexagons.

4. To start sewing your pieces together you will sew rows first.  So take the first to pieces in the first row and line up the seem.  Remember that you will have tabs sticking out on each end to compensate for the seam allowance.

IMG_2739

5. Sew a 1/4 inch seam, then press open.IMG_2740

6. Attach the next piece in the row the same way.  Continue until you have all 6 rows finished.

IMG_2742

7. Sew your rows together and press seams.

IMG_2743

8. Trim your block to 12.5″ square.

IMG_2744

Your finished!

IMG_2746


Note:  If you happen to own Jaybird Quilt’s Hex N More ruler the 4.5″ hexagon works great for this block!

March Feature Quilt

FrontThis month features another amazing member of our guild – her specialty is extra tiny quilts!  Her is what she has to say about her quilt:

Back

“As part of our ongoing block of the month program, Vikki kindly brought her die cutting machine to the February meeting.  Members brought their fabrics and she used the machine to cut perfect Drunkard’s Path pieces for them!  At the end of the meeting, a small bag of teeny scraps happily went home with me.  After trimming off the threads and edges, I found myself with a fascinating assortment of fairly uniform bits ranging in size from ⅝” by 1 ⅝” to 1” by 2”.  After sorting and stacking them by colour I discovered I had at least 6 of each fabric and the colours blended beautifully.  I stacked them sideways in a teeny box and let a plan form over a few days.
The idea was simple.
– Sew 6 braids in the same colour order.
– No trimming until the braids were completed and ready to be squared up.
– Every third strip a neutral.
– Any additional fabrics must be neutrals from my scrap collection.
A few hours alone in my sewing room and a small quilt top formed.  6 similar braids framed in white.  It made me happy, but the leftover bits still in the box looked sad.  Some guild members had brought fabric that had cut 8 repeats instead of 6, so with pairs left over of only about half the colours, I felt compelled to keep sewing.  I sewed 2 matching strips and squared them up.  I dug out some long skinny grey bits I had fallen in love with (left over from a fussy cutting project and barely an inch wide).  A little creative framing and more white scraps, and the back was finished.  I carefully sandwiched it to keep the seams aligned front and back, sewed some simple almost-straight line quilting at irregular intervals, then gave it a quick bath before binding (to make the quilting pop).  A binding of the remaining grey strips, and it was complete.
Is it a miniature?  I’m not quite sure.  It finished about 12” by 15”.  Strictly speaking it’s about 1:6 scale, a twin sized quilt for Barbie.  Looking at it I am reminded of how a guild (like a bag of scraps) can grow into more than the sum of its parts.  Oh dear, I think I sewed a metaphor.”
Barbie

Block of the Month – Herringbone / Braid

IMG_2502This month we are doing a simple block that is lots of fun to play with!  It comes together quickly, so have fun with it.

Materials:

13 2.5″ strips of fabric (can vary in length from 5″ to 18″ depending on were in the block you want them)

Directions:

1. Using your 45 degree mark on your cutting mat  or ruler  cut the end off one of you strips to give you a small triangle.

IMG_2496

2. Take another 2.5 strip and line it up along the edge a ridge of the triangle (right sides together) and sew together.  Press open.

3. Take a third 2.5 strip and along it along the edge with the seam from joining the first two (it will attache to both strips. Sew and press open.

IMG_2497IMG_2498

4. Repeat this alternating the side that you add the new strip on each time.

IMG_2500

5. Once the block is over 13″ wide in across the bottom you can start trimming so your strips do not need to be as long.  I put my overlap “center” area of the design more to one side, but you can put it however you would like.

IMG_2501

6. Continue adding strips until the block is at least 13″ wide and 13″ tall.  Trim off to make a 12.5″ square block.

IMG_2502

That is all there is to it, congrats you are done your block for the month!


If you are just joining us check out our previous blocks here.   Remember next month is our last month before we assemble!


Monthy Member Feature – February

Alright, so this is going up a little late, but better late than never right?

A Fall Wind quiltA Fall Wind (20 “ x 70”) by Cris

“I saw this quilt design by Ellen Stuckey in a Quilter’s World magazine several years ago. I finally found a selection of shot cottons and grunge cottons that I thought would work well together. The piecing is mostly improv, consisting of two panelsthat are offset, resulting in an unusual top/bottom edge. The quilt top is quilted to the batting using straight line designs; echo quilting was used to define the leaves. The quilt was then finished with a full back facing rather than the more common binding technique. To hold the back in place it was strategically “stitched in the ditch” along some of the major pieces. As soon as it was finished I hung it in our front entry – just the right addition to a tall narrow wall!”

What a great quilt Cris!

IF you would like to see more of what our members have been making, check out our Flikr page!

Block of the Month – Curves

Block of the month – Stack Circles

IMG_2472

This month we are working with curves!  With that said there are so many great tutorials out there, even from our own members I am going to refer you to some videos for some tips on sewing curves and you will get assembly instructions here!

Materials:

3 coloured fabrics (you will need 3 inner circle, + 1 outside from each of two colours and 4 inner circle pieces from the third colour)

Background fabric for template, 2 3.5″ squares and 2 6.5 x 3.5″ strips

Tempate: Circle template (make sure the print actual size and check the test square)

Directions:

1. Cut out your fabric – remember if you are attending Feb meeting and you bring 5″ squares of each colour and background I will cut them for you!

IMG_2466

2. Mark the middle of the curve of the inner and outer pieces – on the templates I have them marked with a triangle for easy reference, or you can fold each piece in half to have a small crease at the center.  Align the middle of the inner and outer circles.

IMG_2467

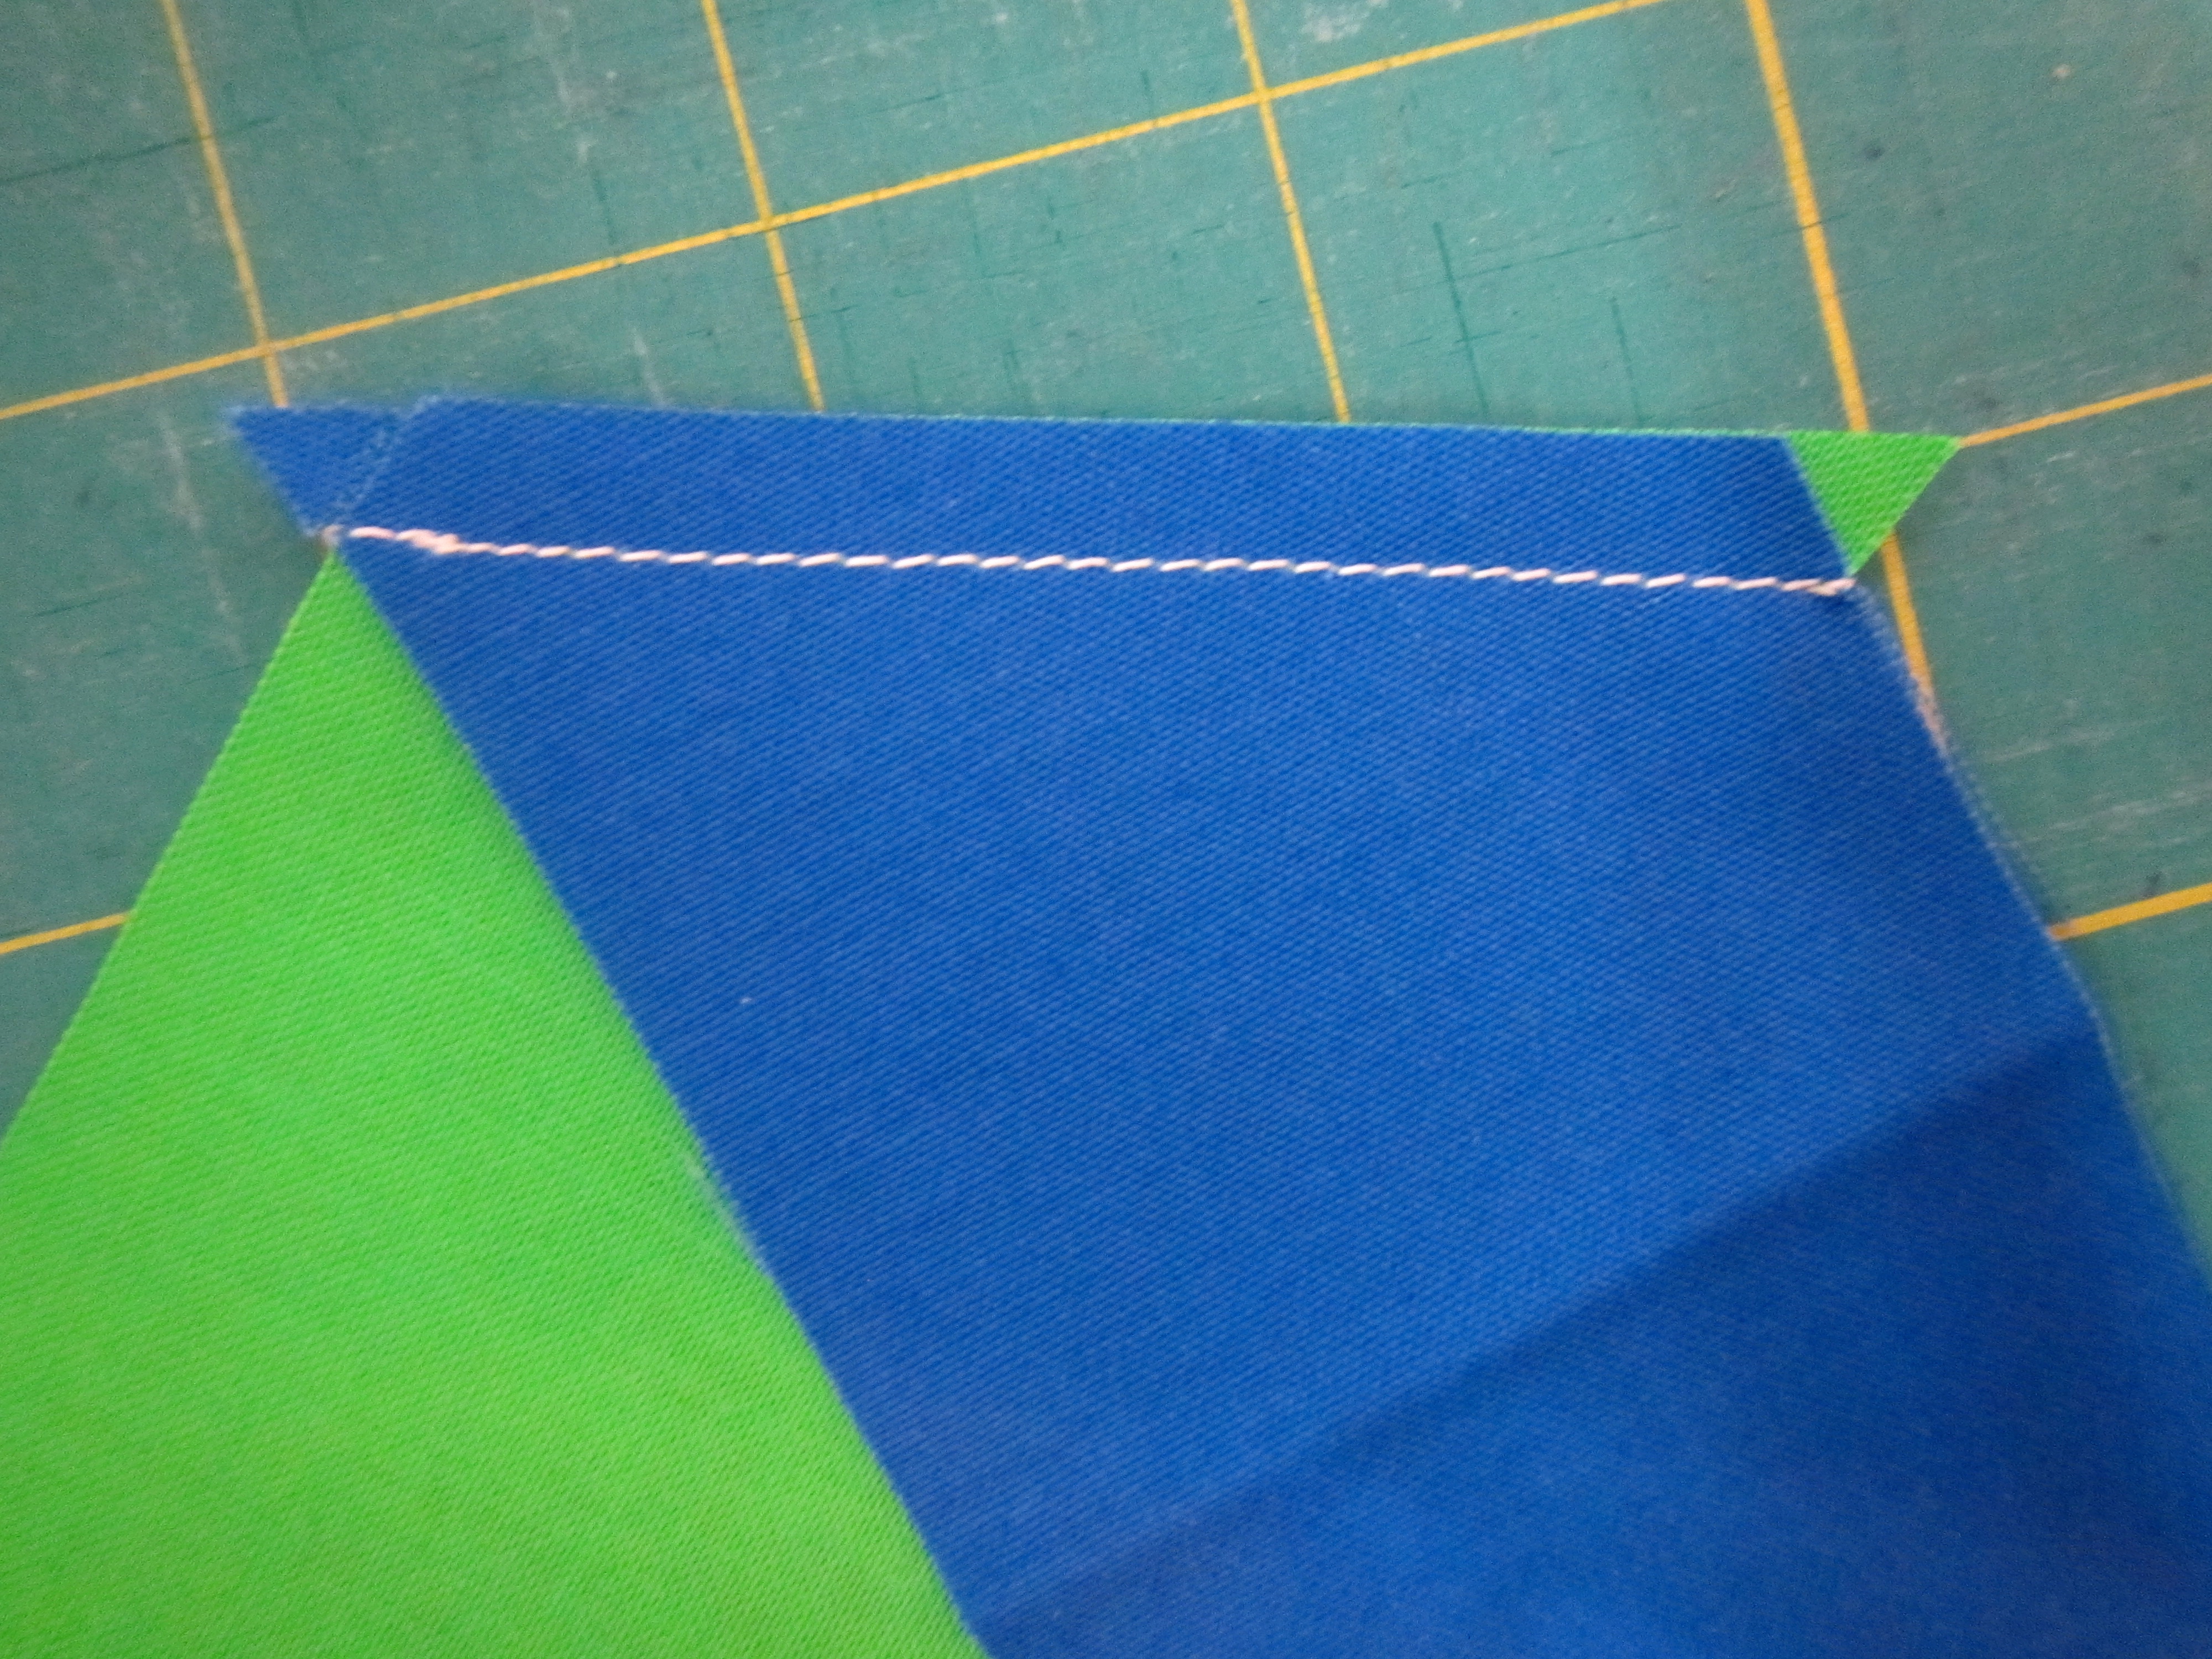
3. Sew a coloured inner circle with a background outer circle. If you are new to sewing curves check out this great tutorial from our member Leanne at She Can Quilt!

IMG_2469

4. Repeat sewing coloured inner circles with background outer pieces for the 2 fabrics that have 3 inner circles each.  Also take 2 inner circles from the third colour and attach them to background outers.

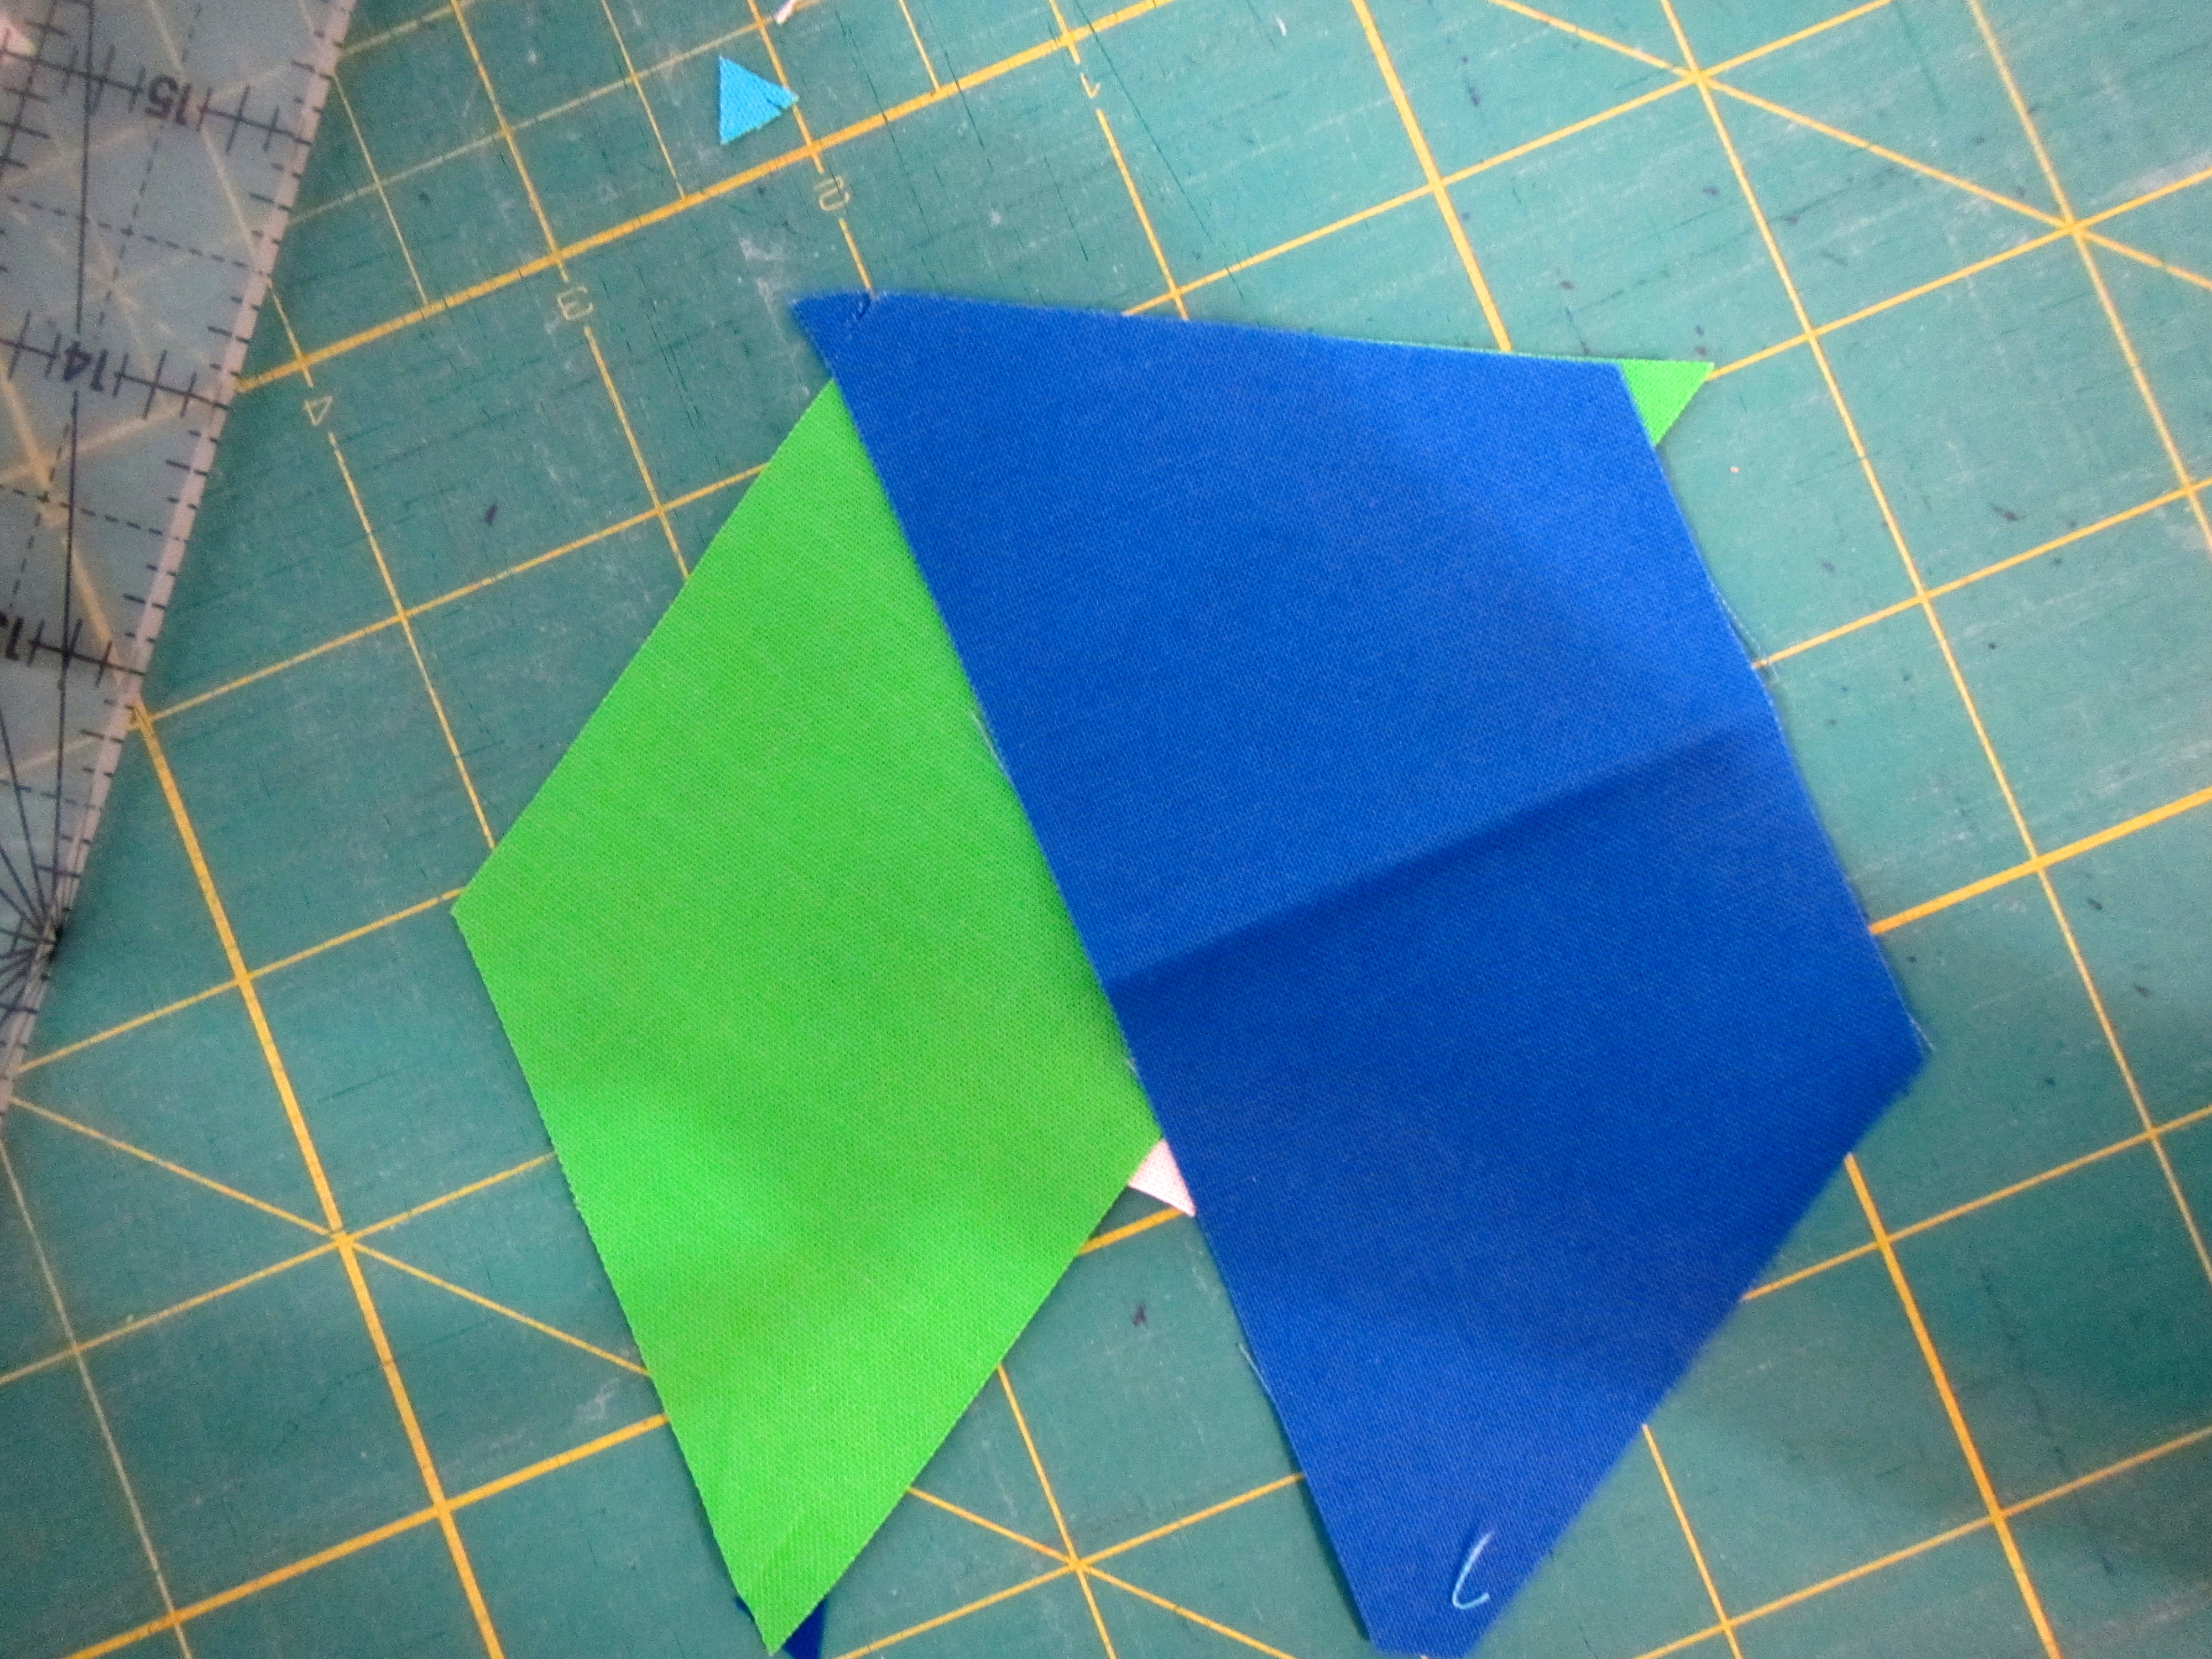
5. Take the remaining coloured inner pieces and attach them to the coloured outer pieces.

6. Press all your seams.

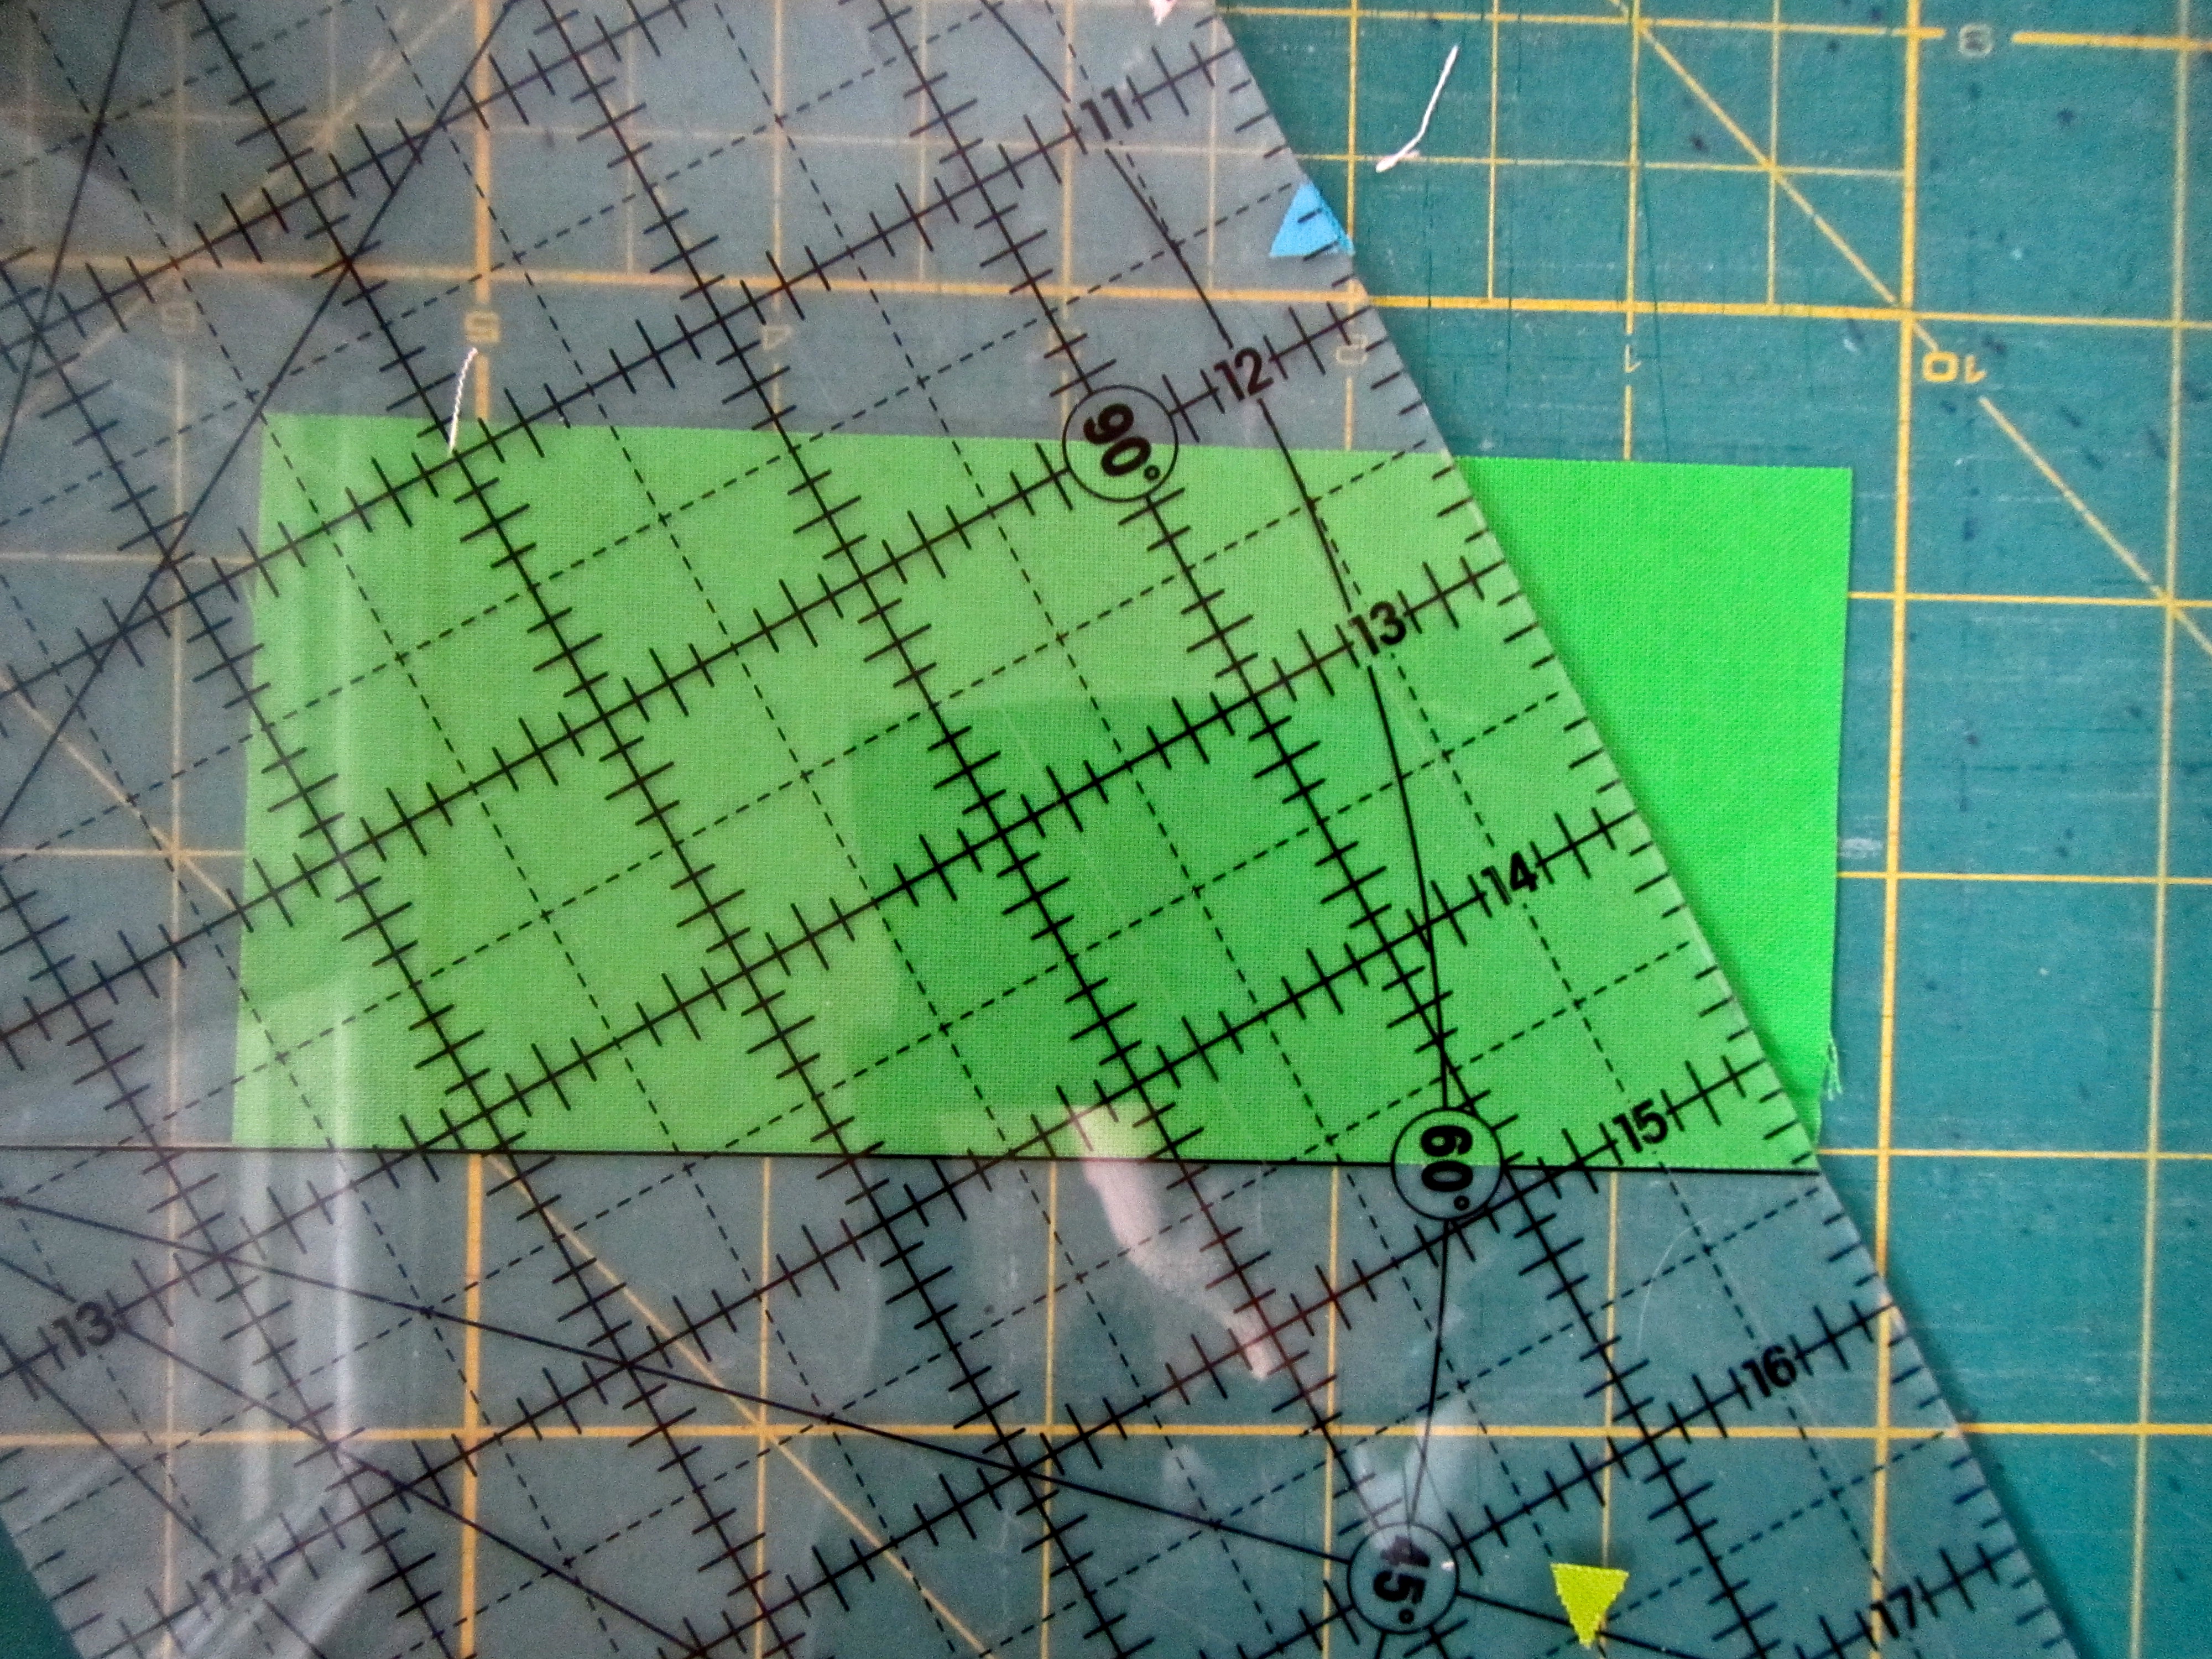
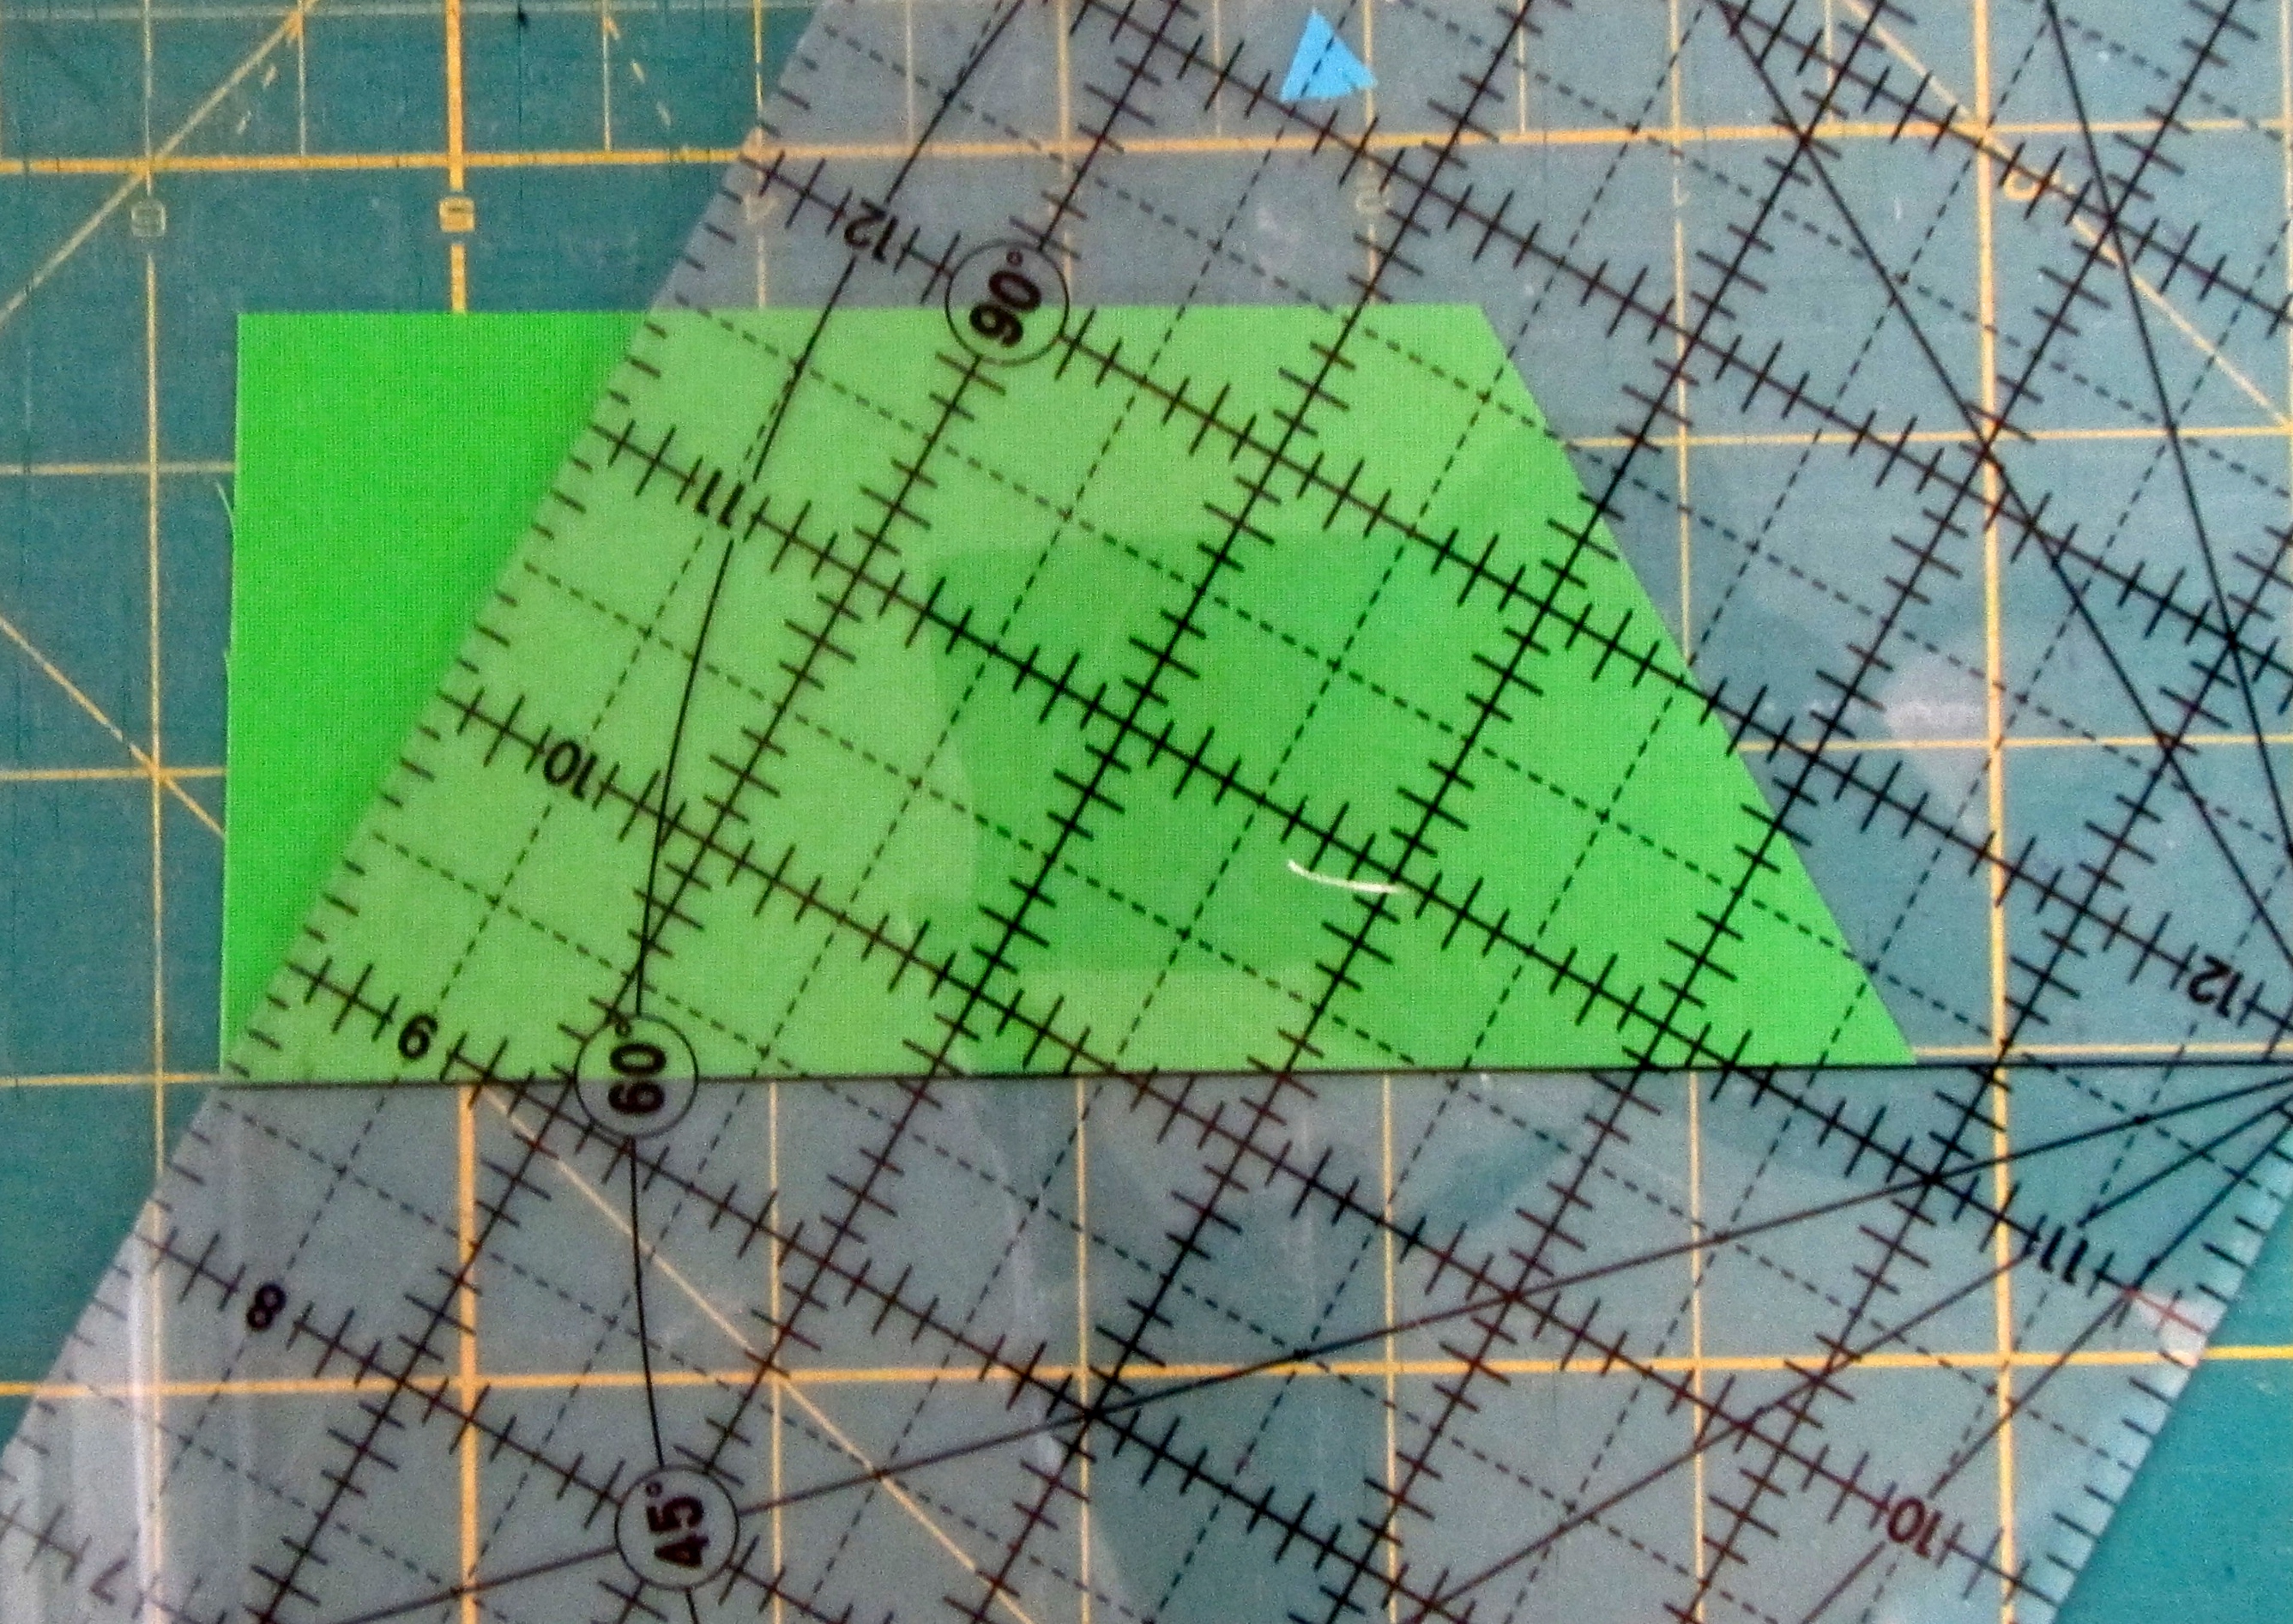
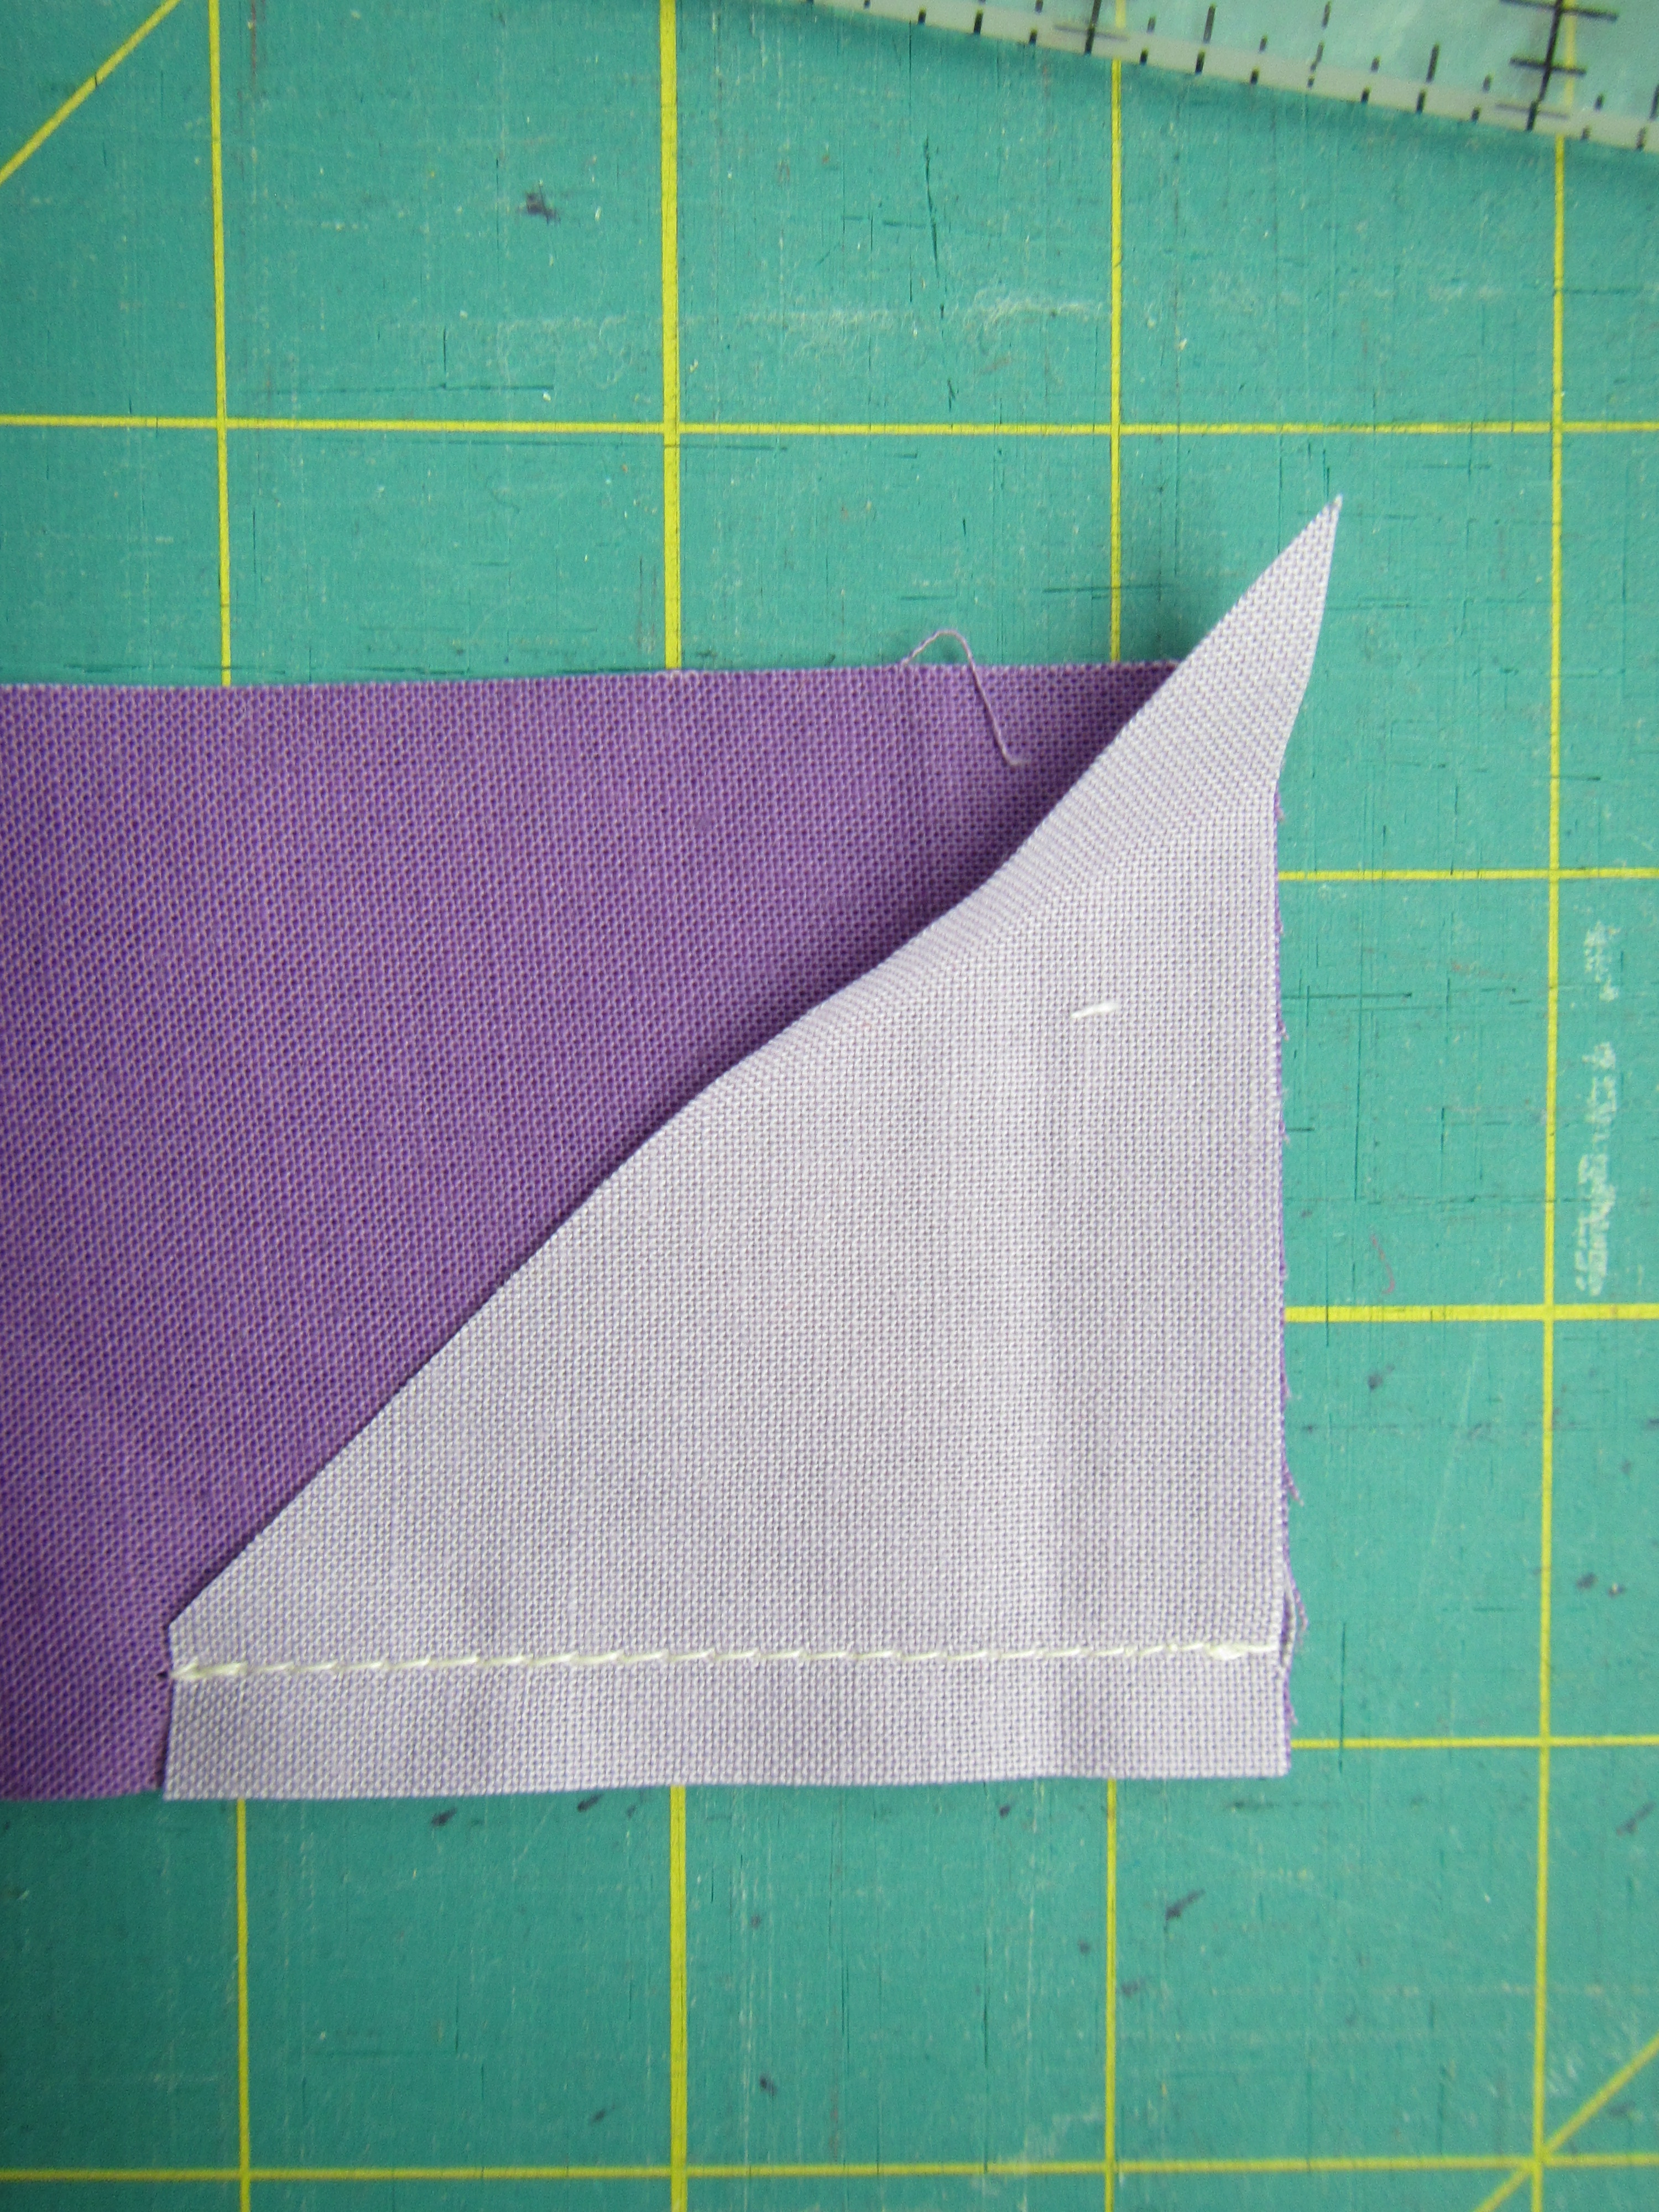
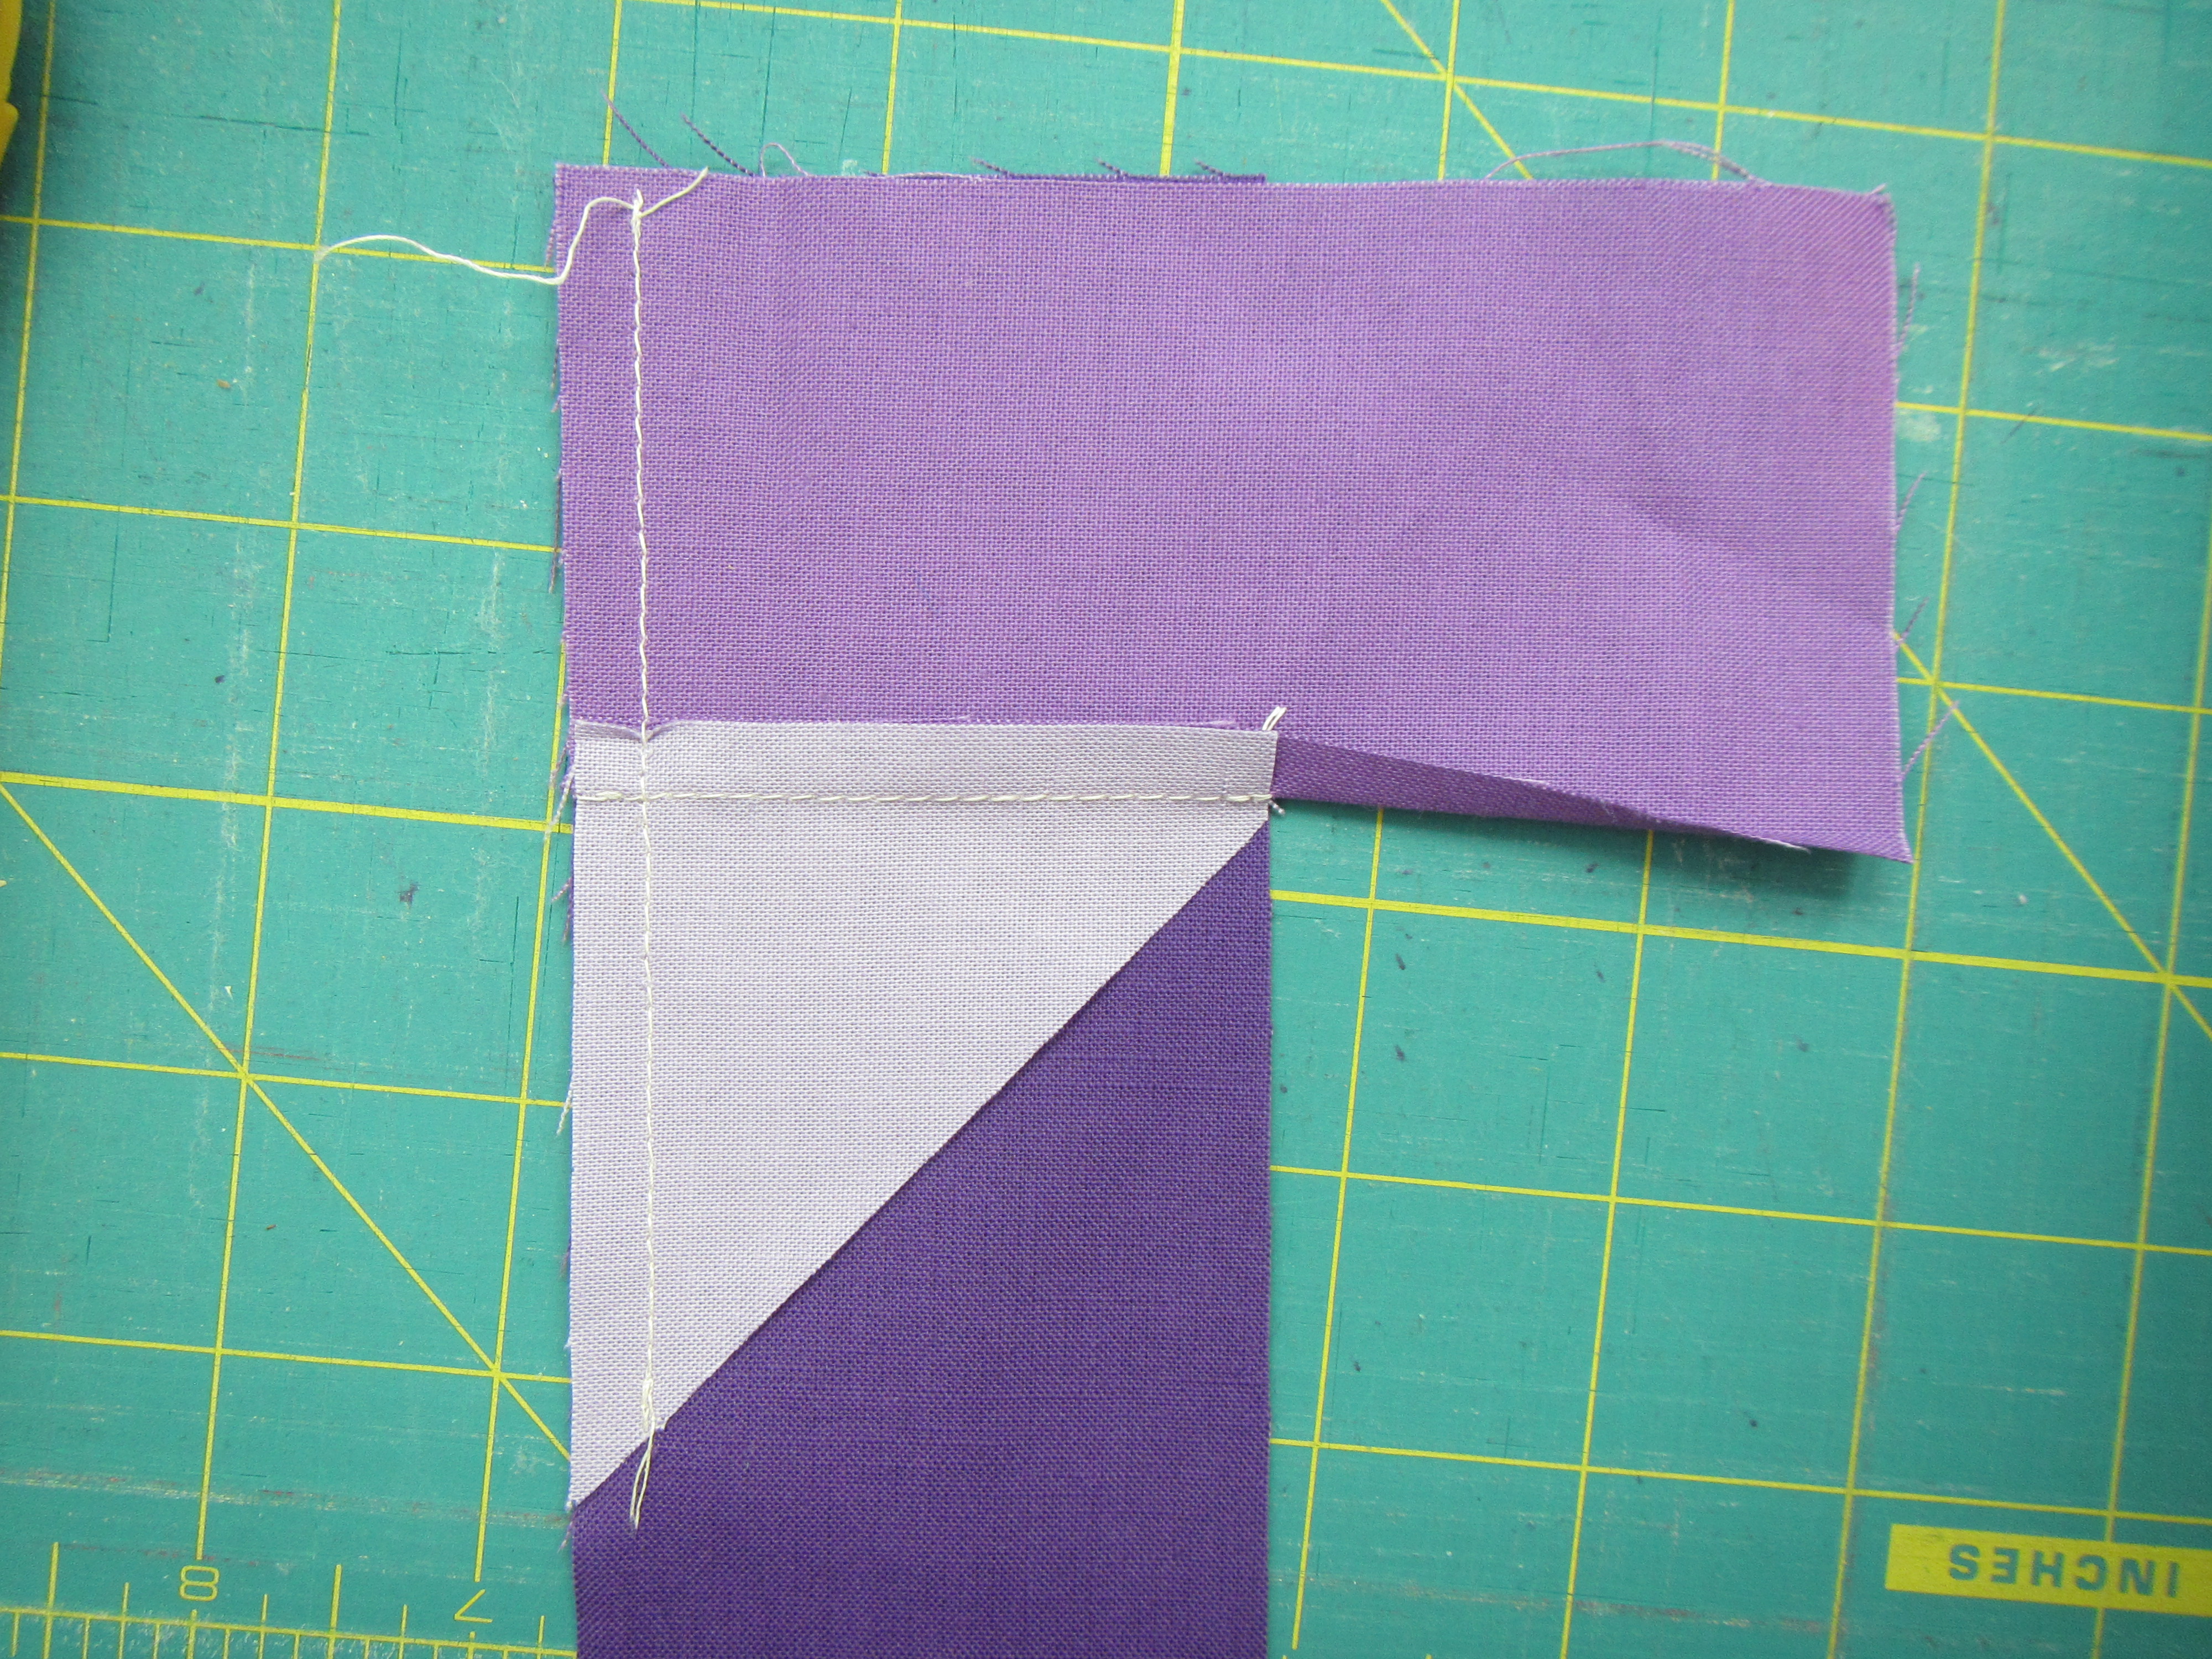
7. Now trim your blocks to 3.5″.  Each block has a generous overage to allow you to square up and remove any stretching that happened during sewing as these are small pieces.  Note that in order for your seams to match up it is important to trim them each the same way so that you have the same amount of coloured vs background in each square.  I found it easiest to square the inner curve then take the majority off the outer square as shown below.

IMG_2470

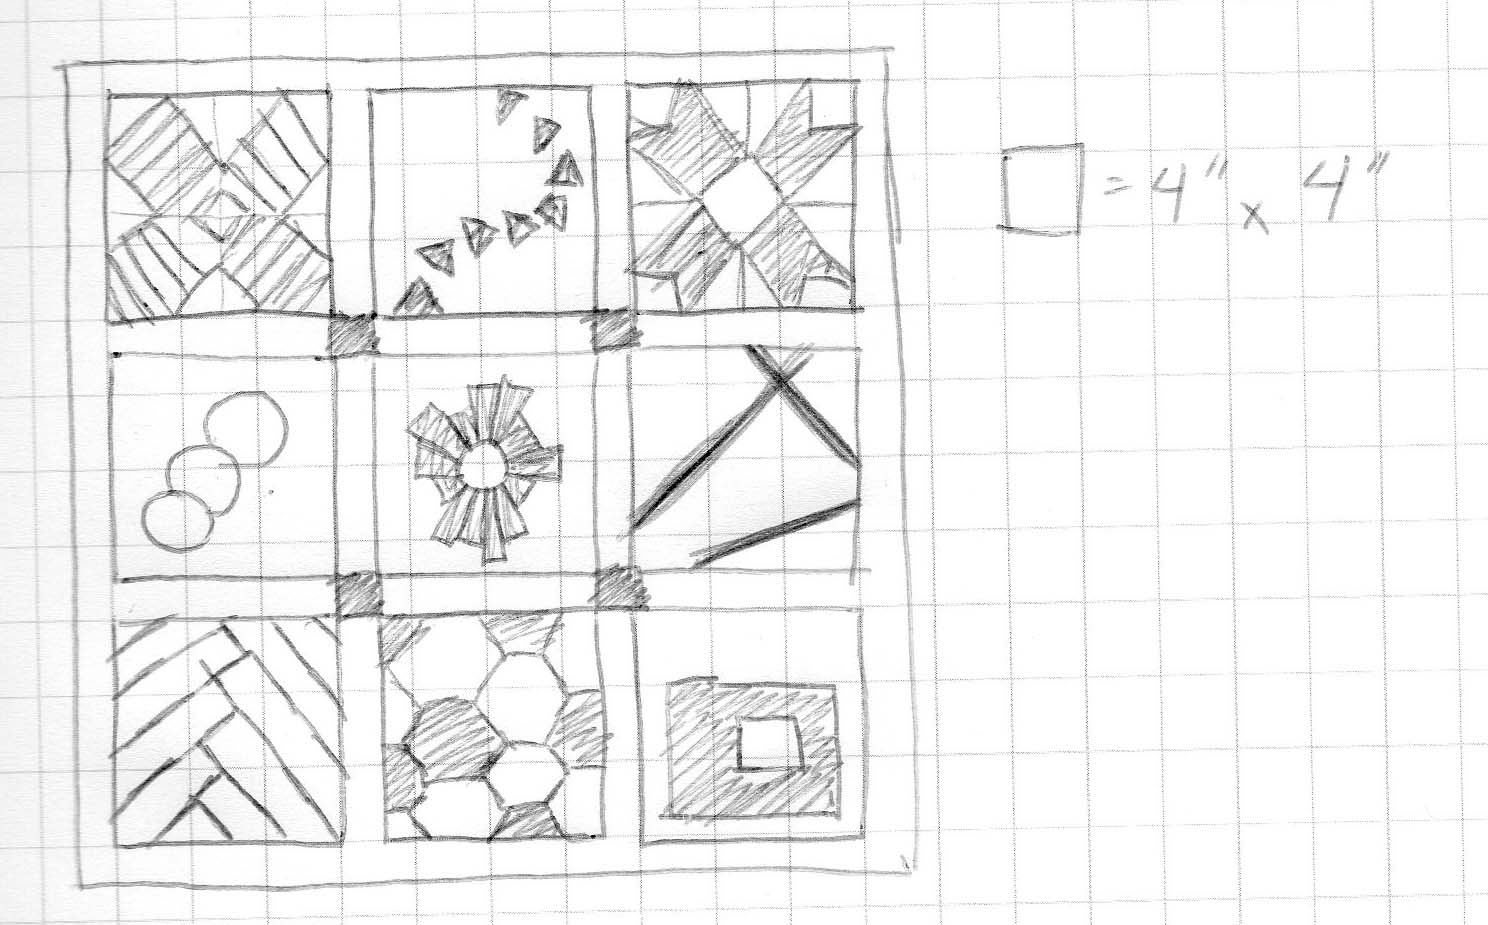
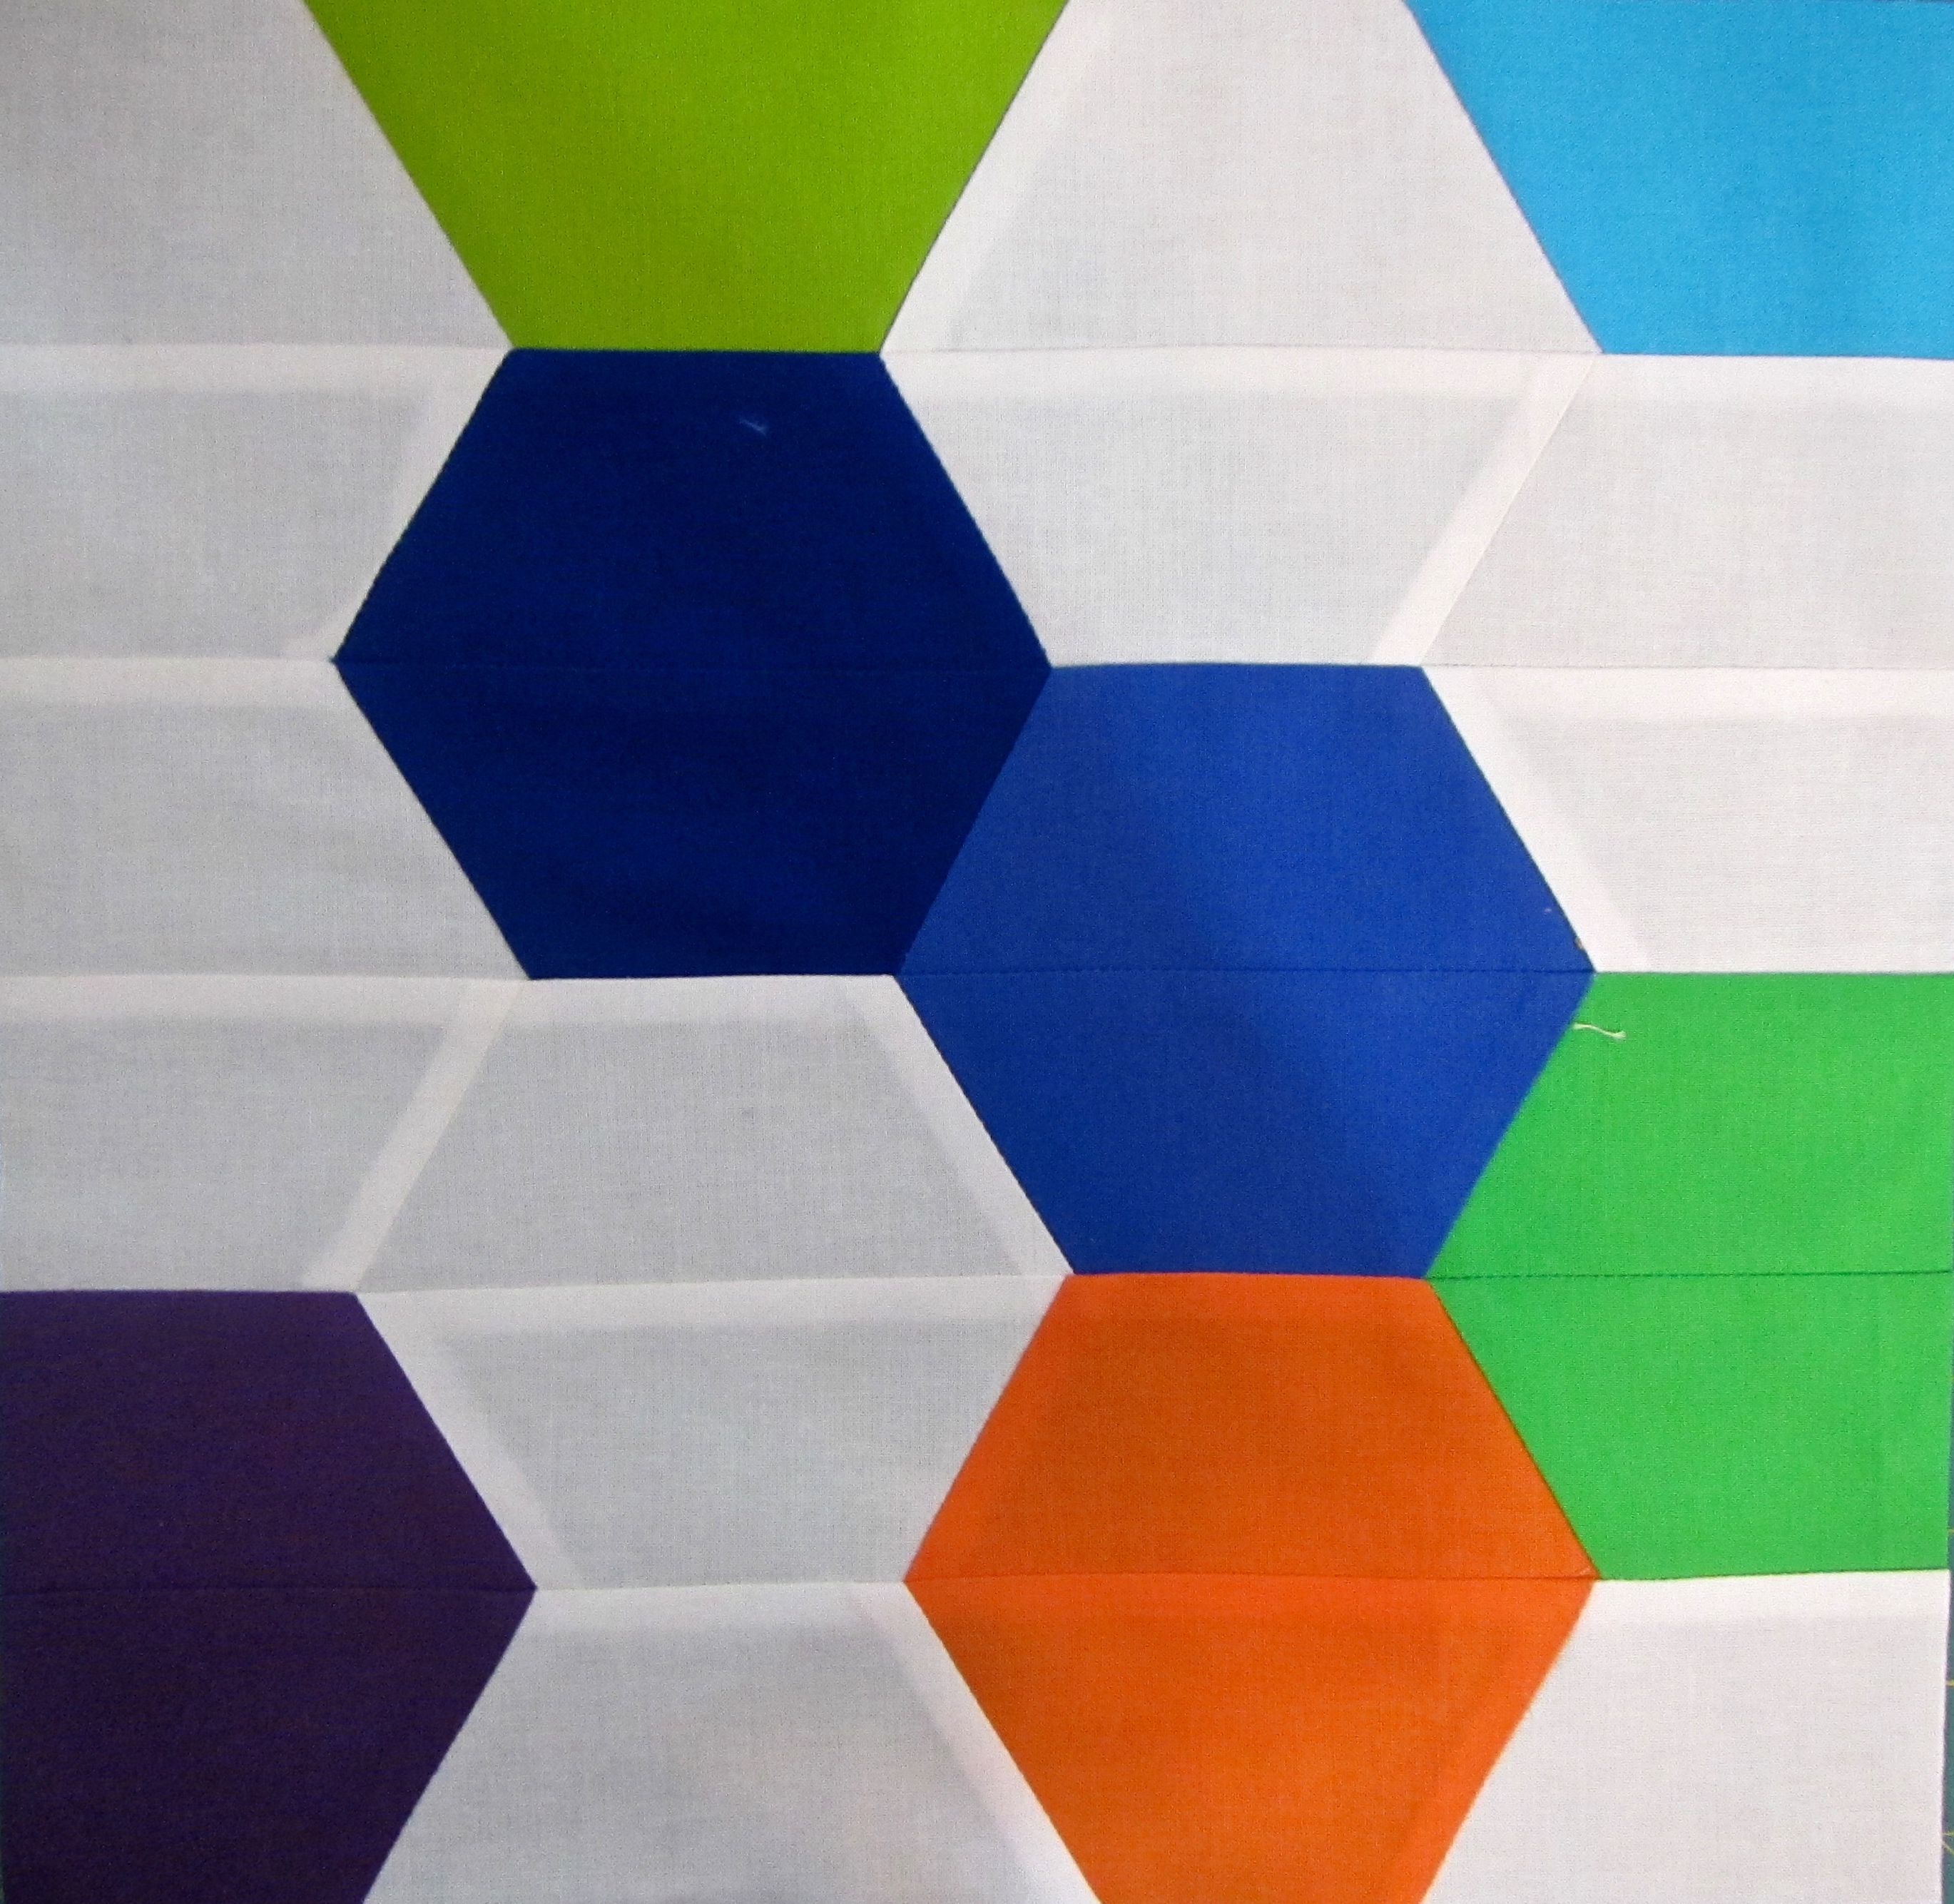
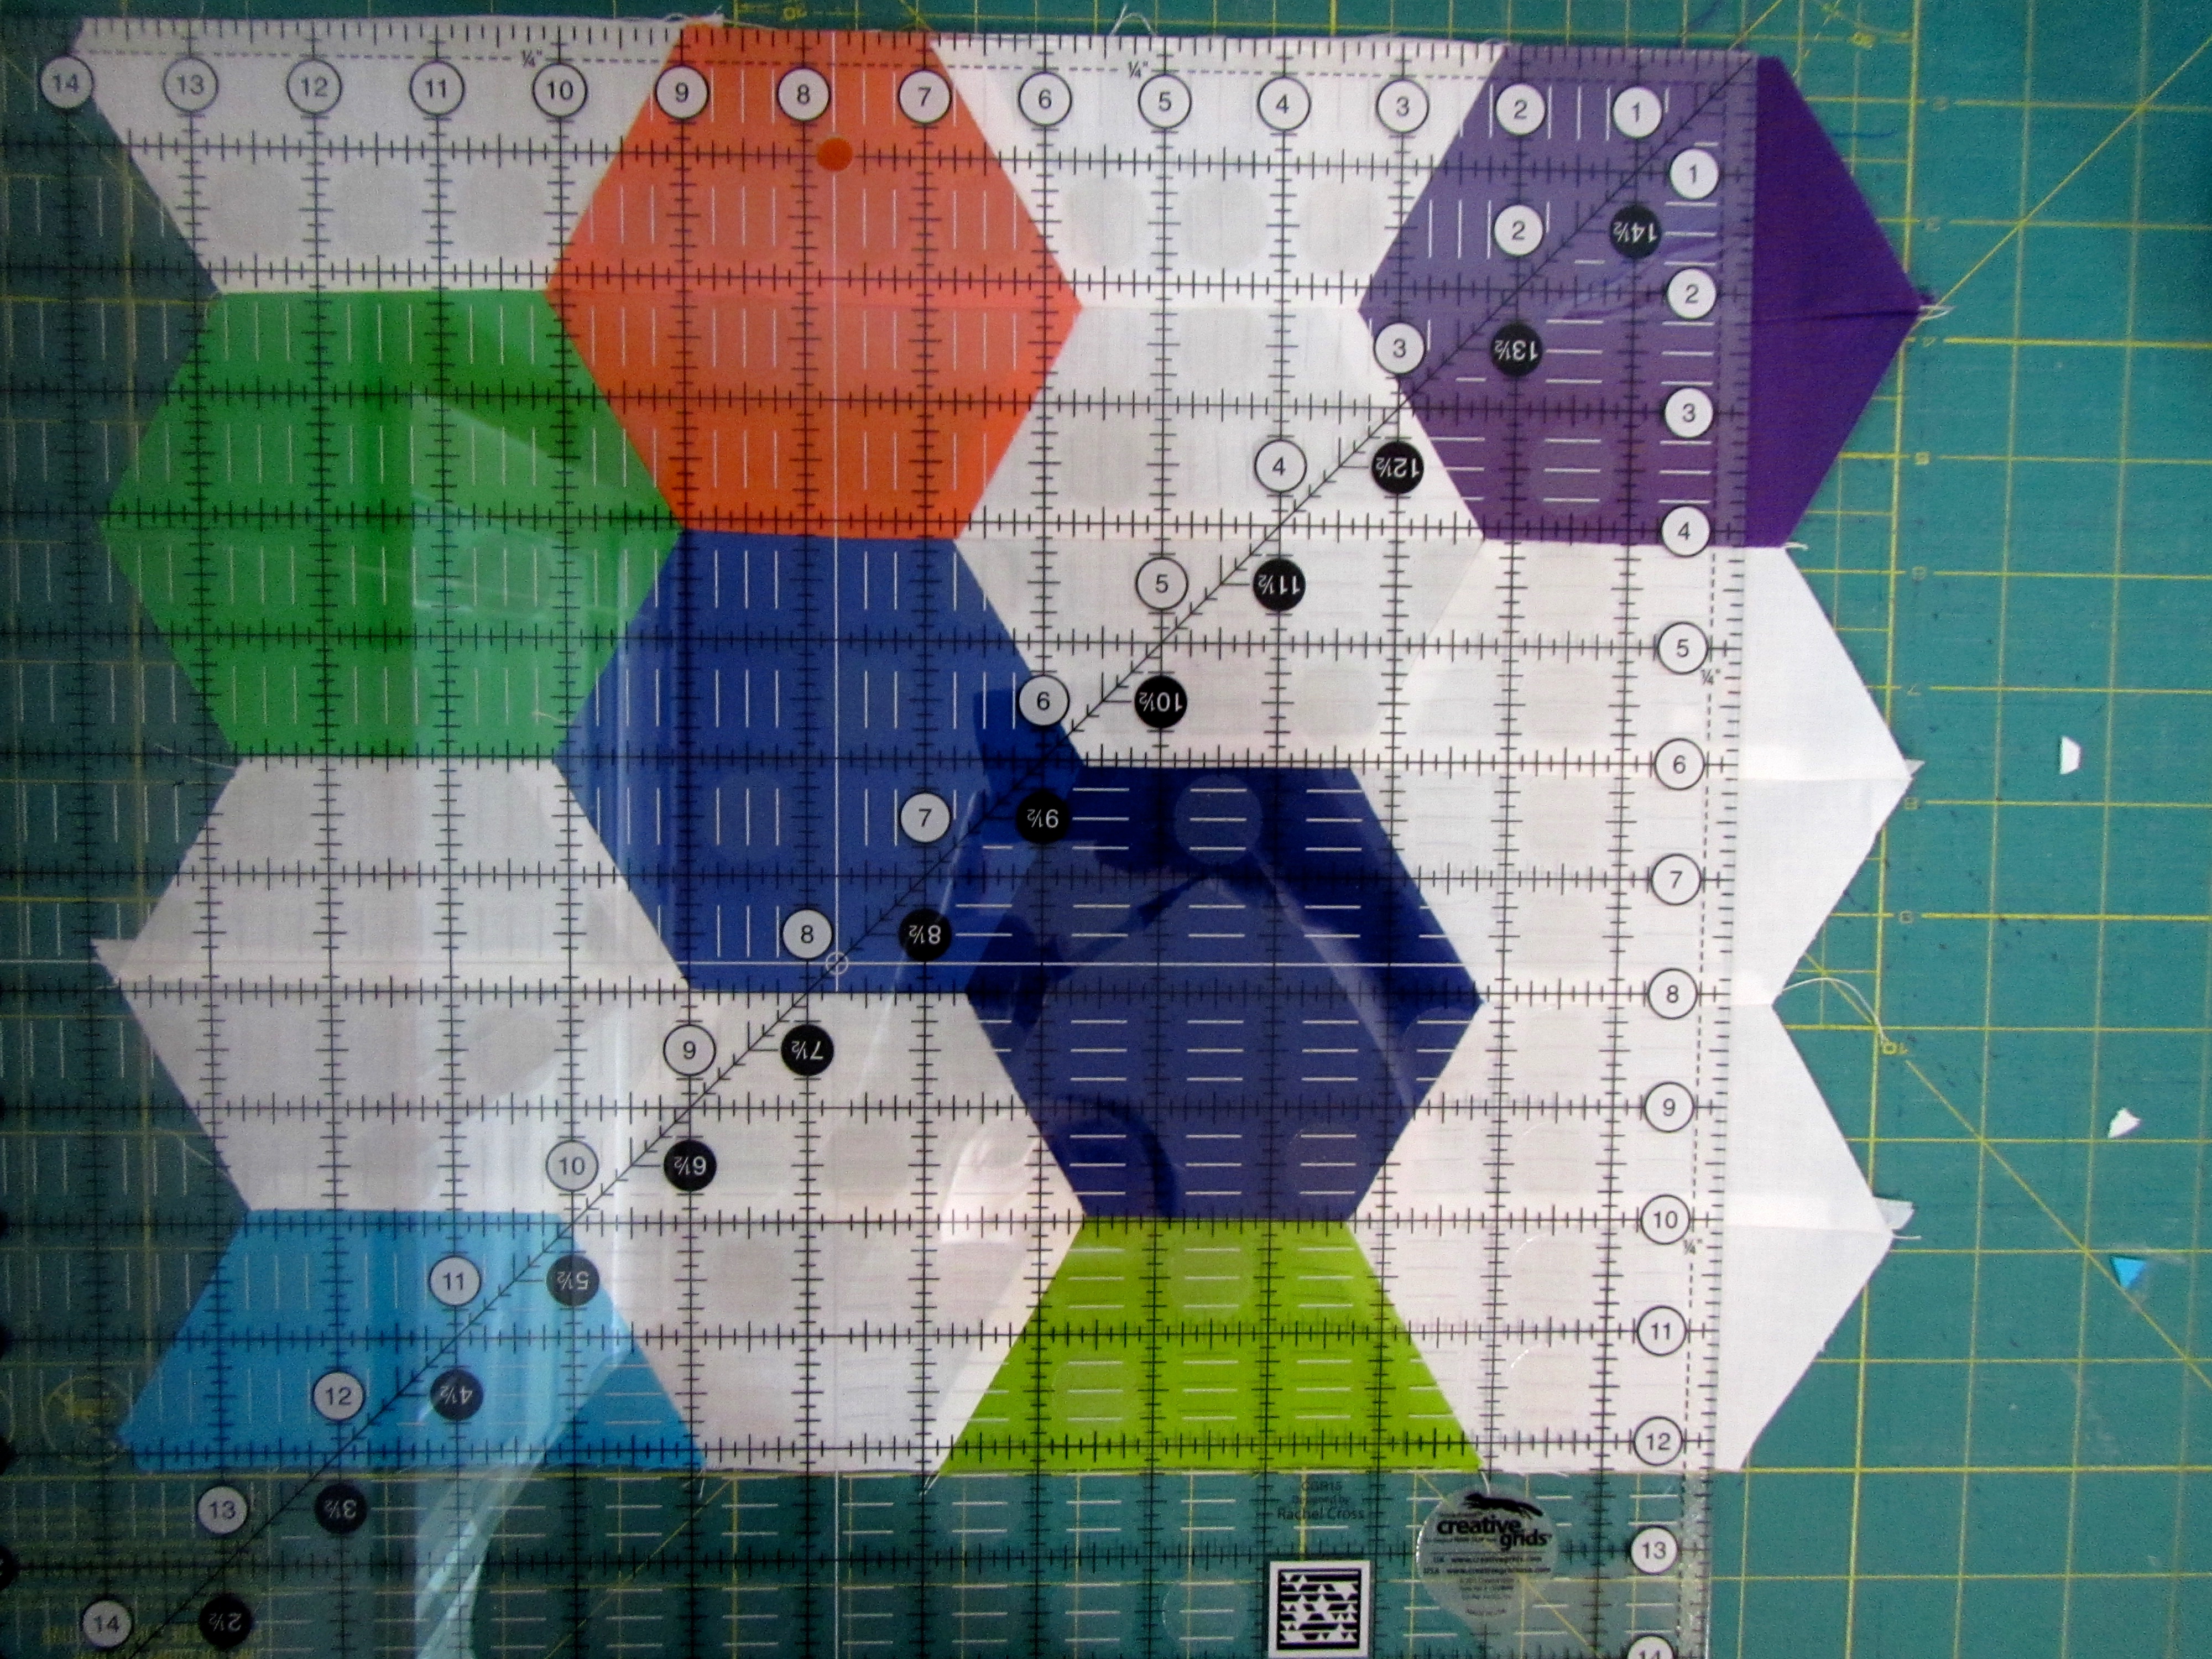
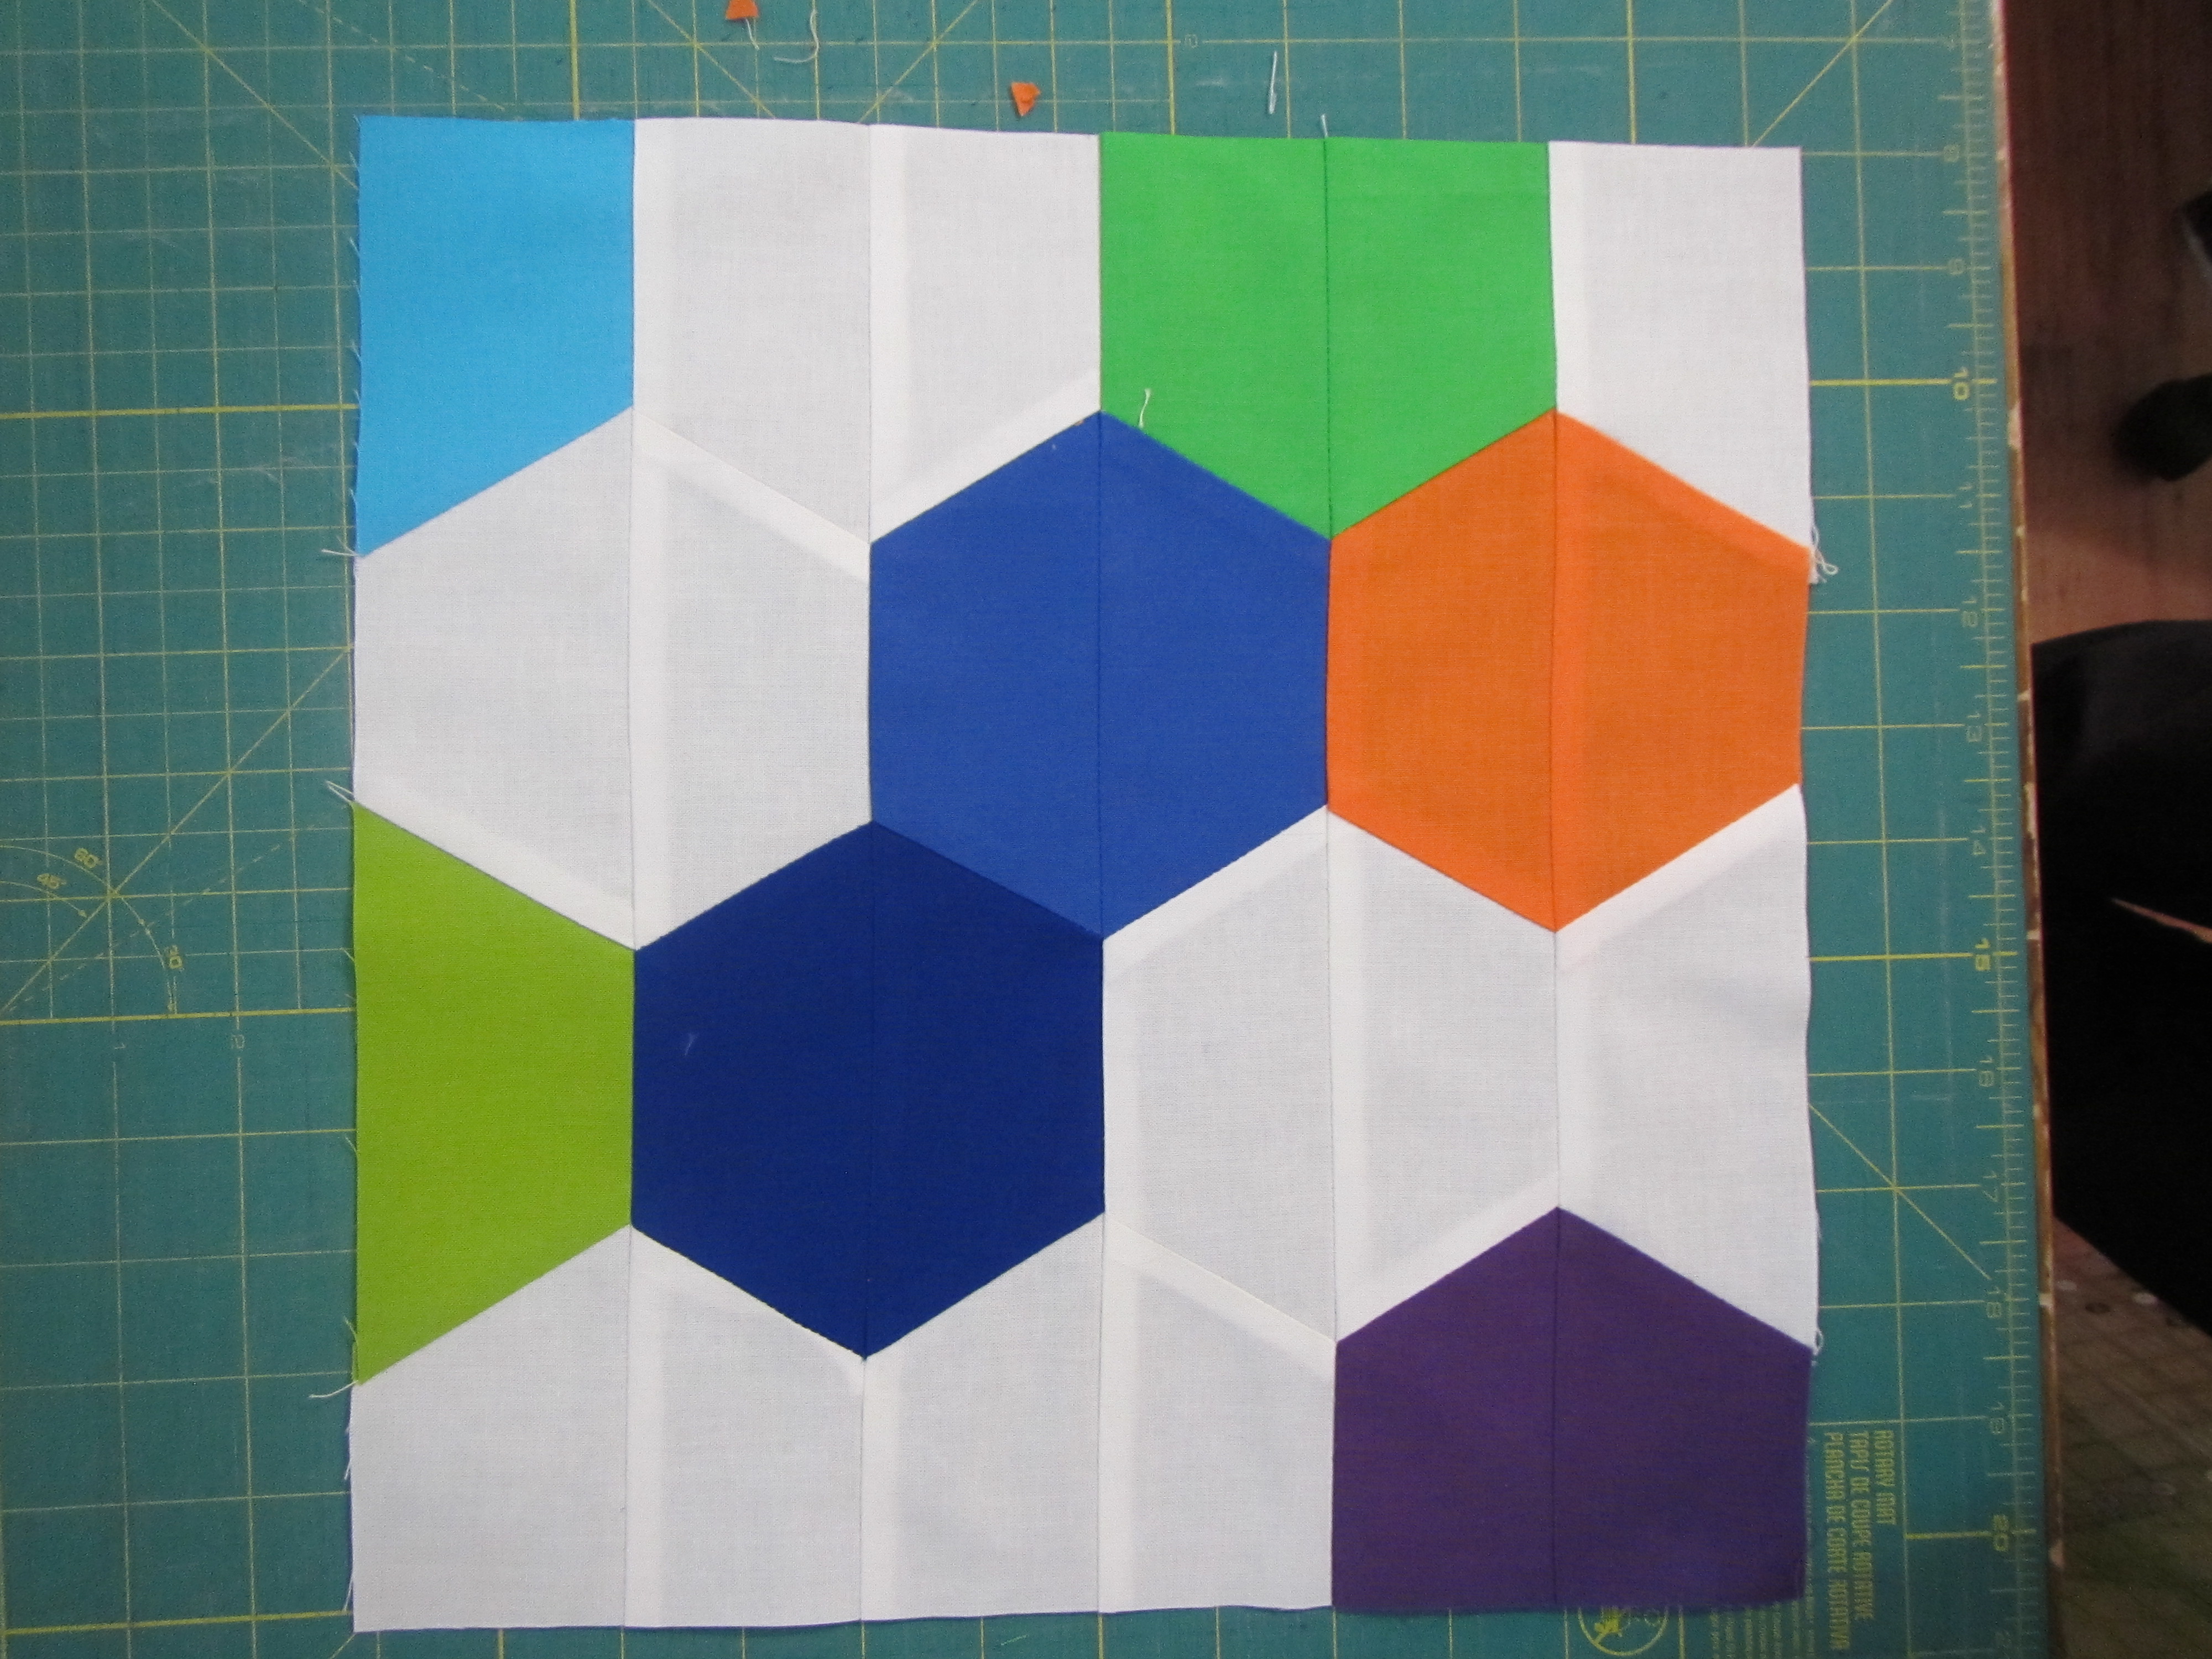
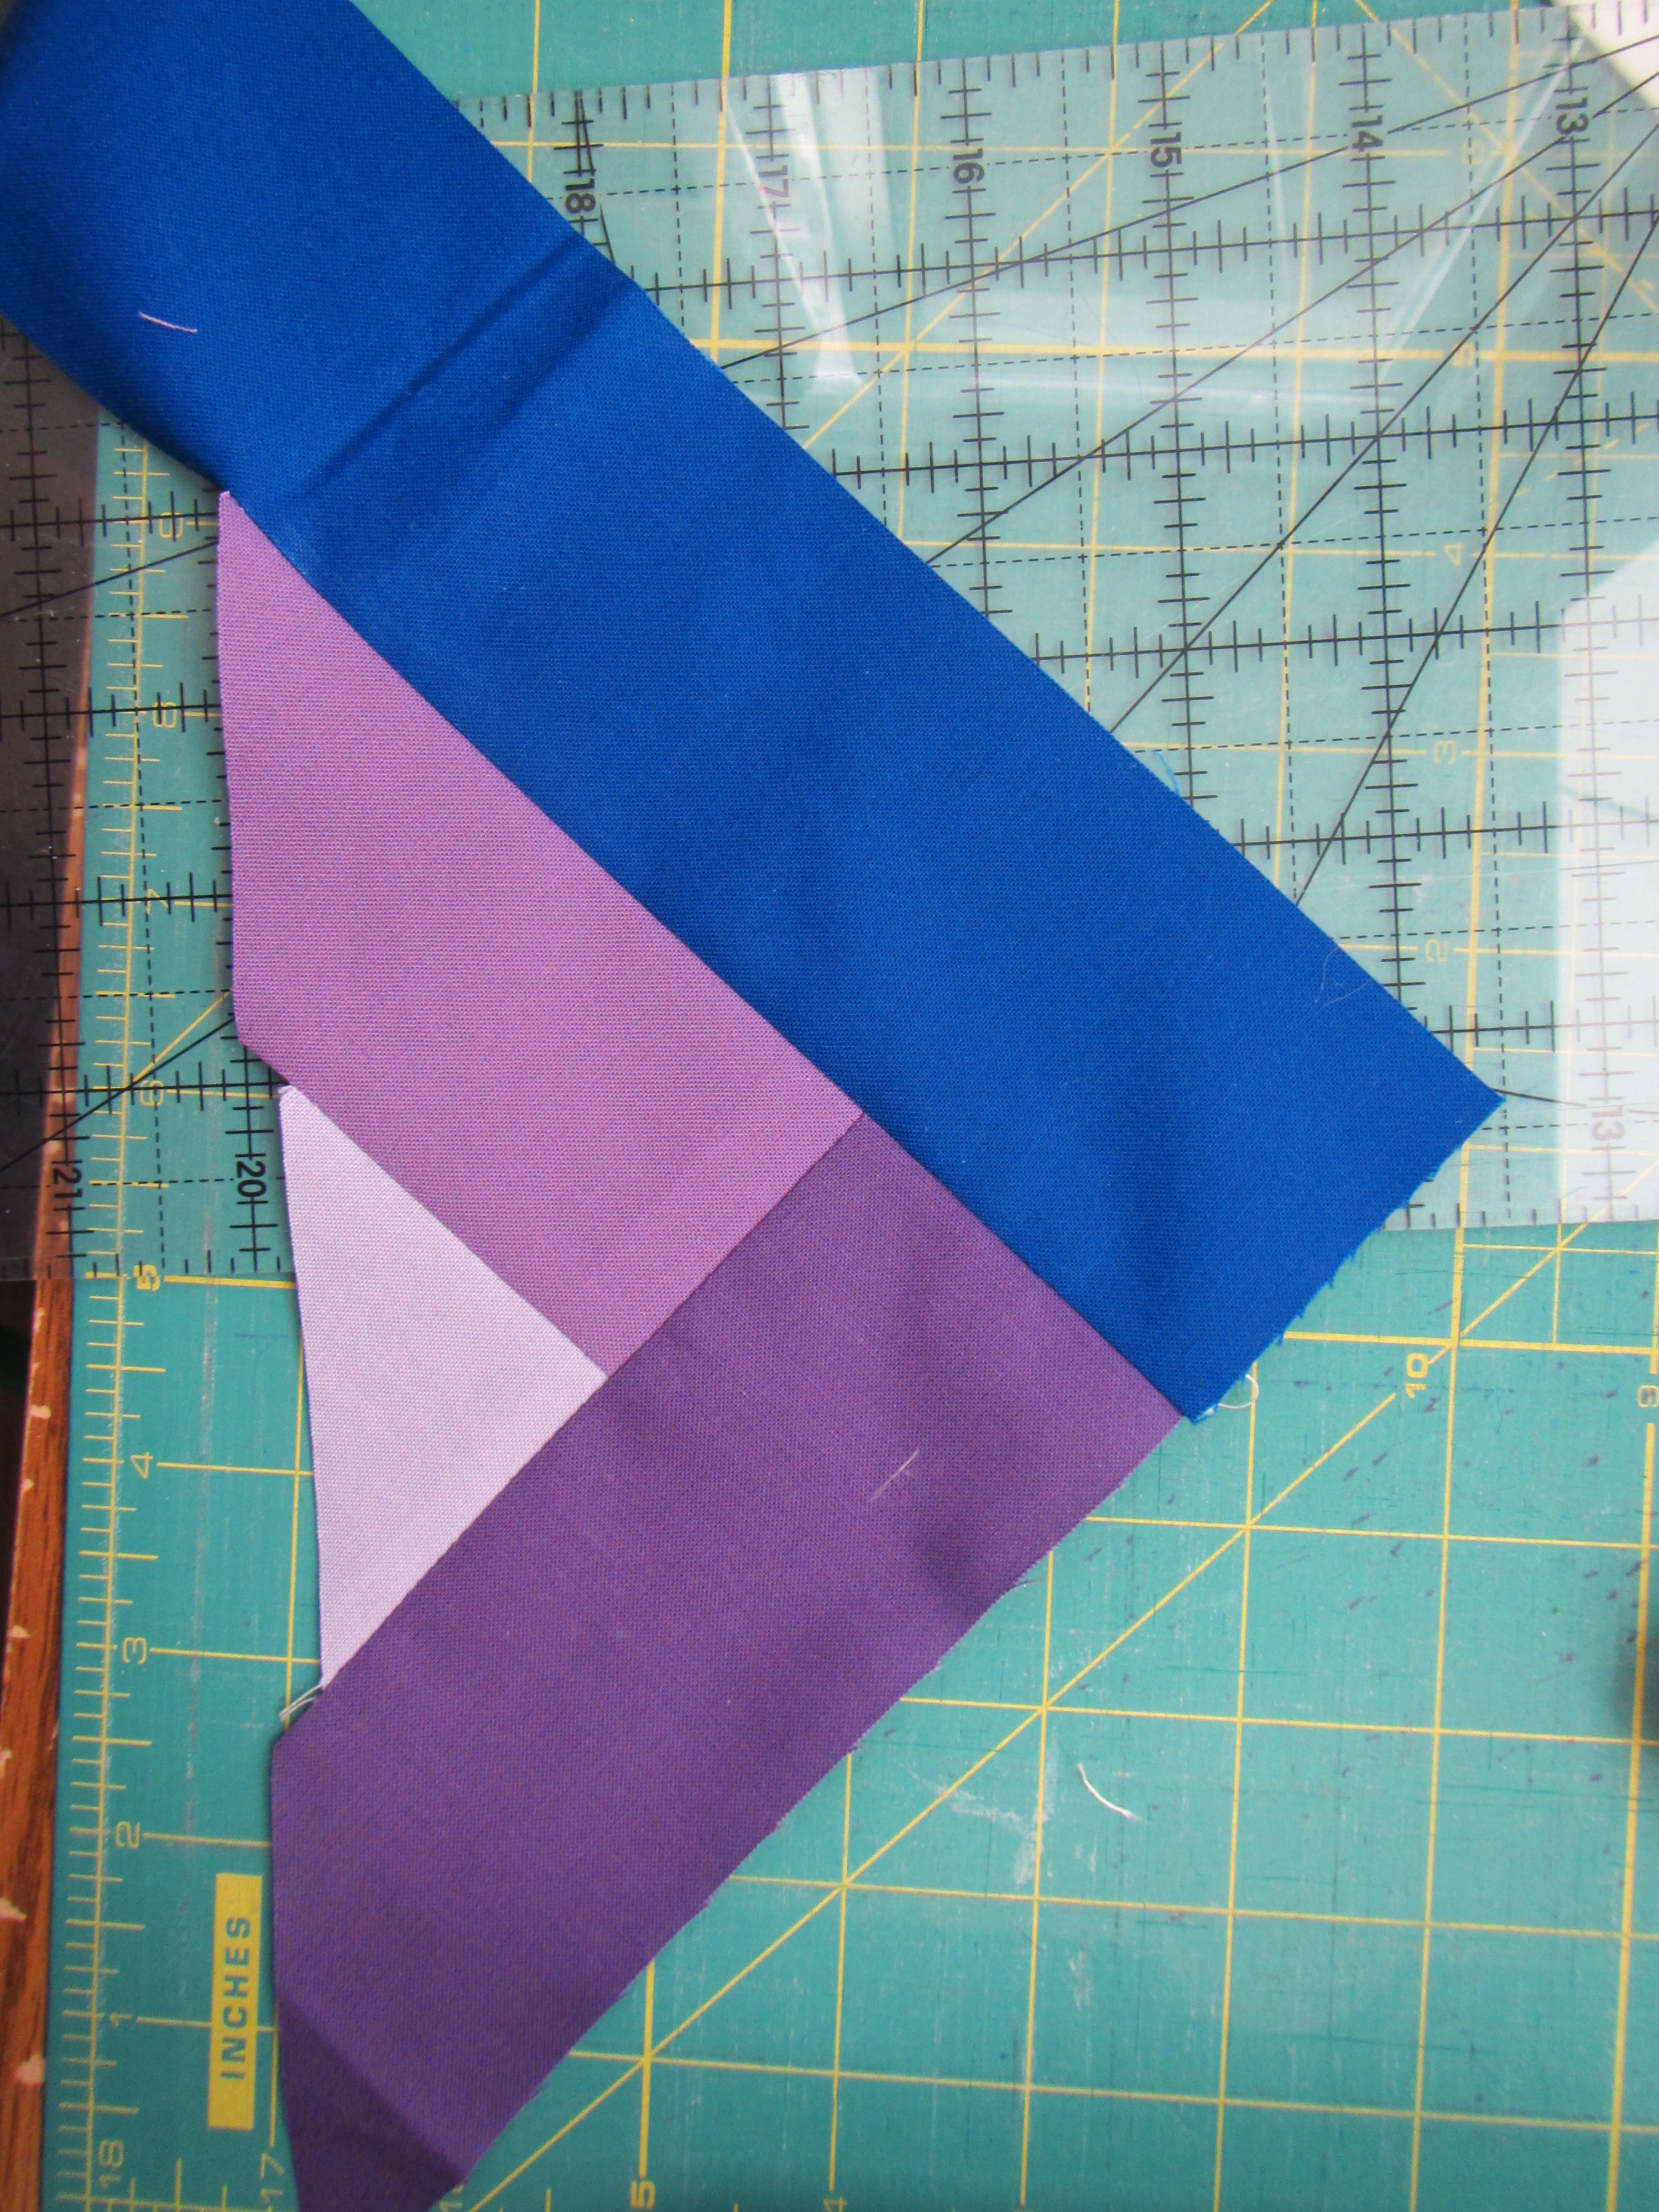
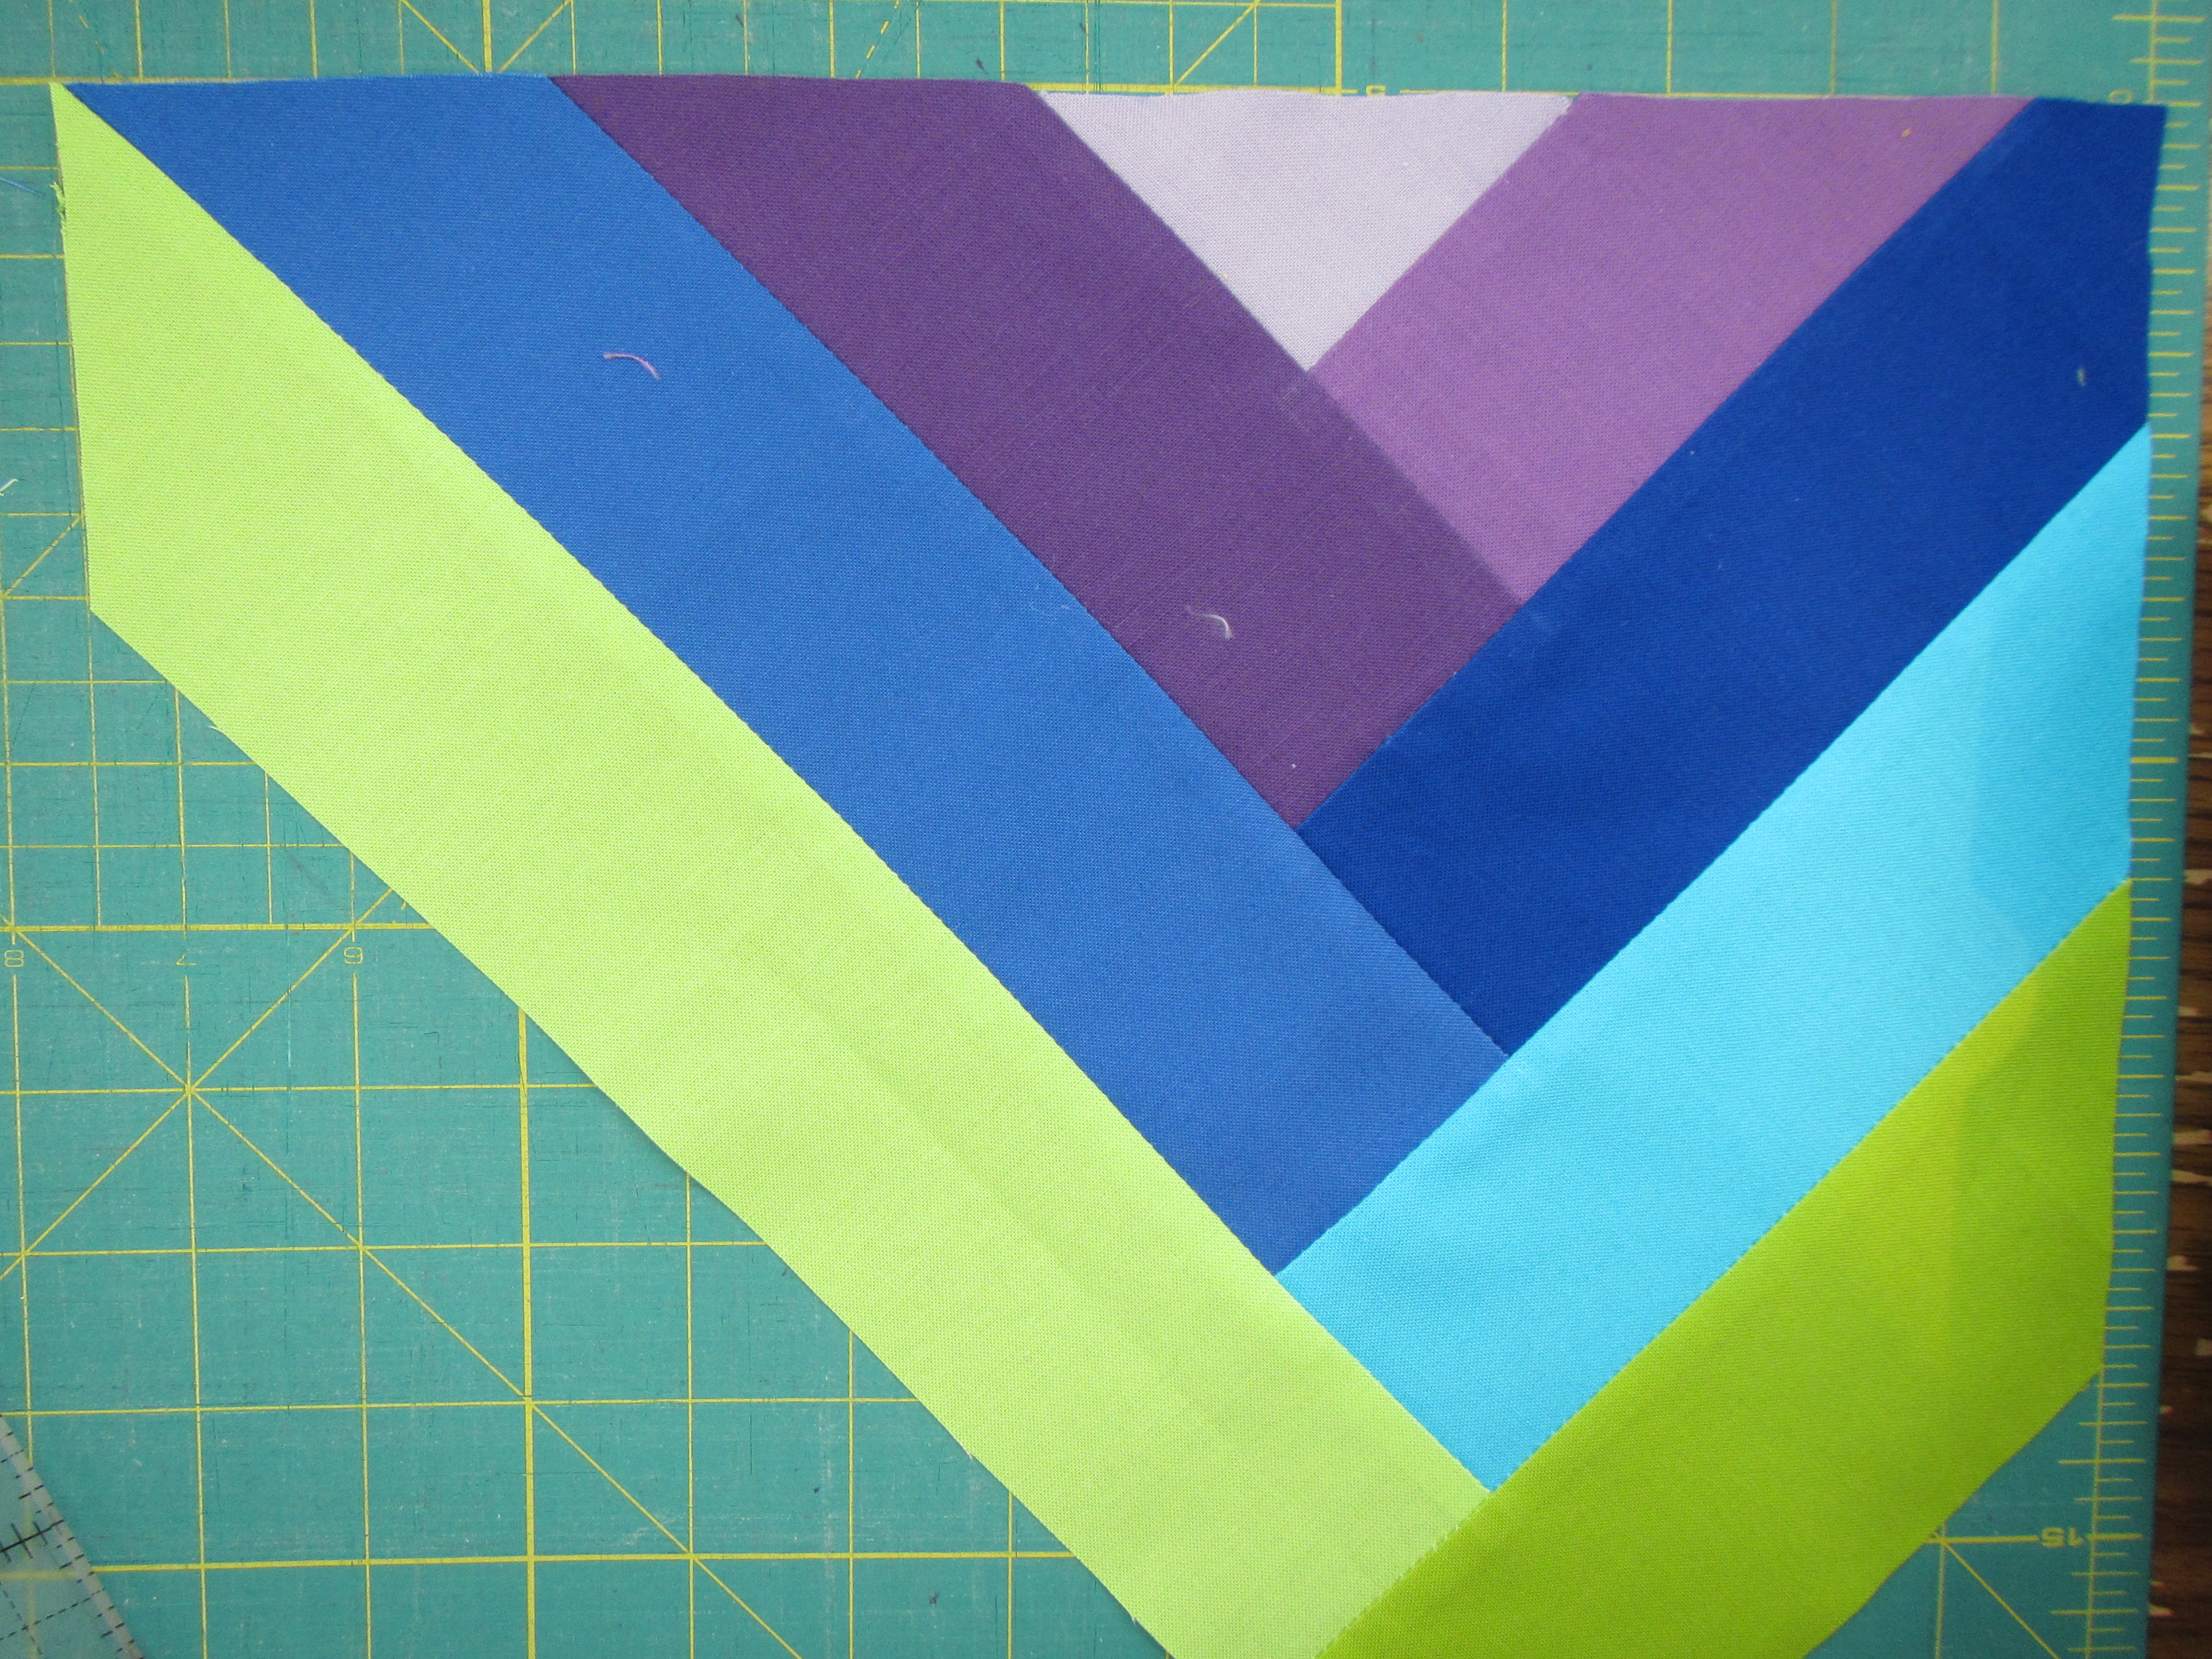
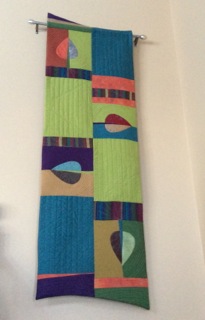
8. Assemble your block arranged like this: (or get creative as come up with your own arrangement).

IMG_2472When assembling watch your curves to make sure the seams meet – unlike mine which was put together after very little sleep and will need to be fixed! In the interest of getting this up you get to see my poorly matched seems.