Block of the month – Stack Circles
This month we are working with curves! With that said there are so many great tutorials out there, even from our own members I am going to refer you to some videos for some tips on sewing curves and you will get assembly instructions here!
Materials:
3 coloured fabrics (you will need 3 inner circle, + 1 outside from each of two colours and 4 inner circle pieces from the third colour)
Background fabric for template, 2 3.5″ squares and 2 6.5 x 3.5″ strips
Tempate: Circle template (make sure the print actual size and check the test square)
Directions:
1. Cut out your fabric – remember if you are attending Feb meeting and you bring 5″ squares of each colour and background I will cut them for you!
2. Mark the middle of the curve of the inner and outer pieces – on the templates I have them marked with a triangle for easy reference, or you can fold each piece in half to have a small crease at the center. Align the middle of the inner and outer circles.
3. Sew a coloured inner circle with a background outer circle. If you are new to sewing curves check out this great tutorial from our member Leanne at She Can Quilt!
4. Repeat sewing coloured inner circles with background outer pieces for the 2 fabrics that have 3 inner circles each. Also take 2 inner circles from the third colour and attach them to background outers.
5. Take the remaining coloured inner pieces and attach them to the coloured outer pieces.
6. Press all your seams.
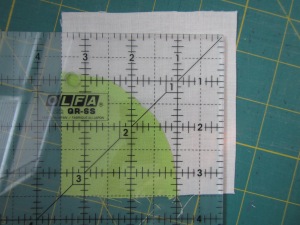
7. Now trim your blocks to 3.5″. Each block has a generous overage to allow you to square up and remove any stretching that happened during sewing as these are small pieces. Note that in order for your seams to match up it is important to trim them each the same way so that you have the same amount of coloured vs background in each square. I found it easiest to square the inner curve then take the majority off the outer square as shown below.
8. Assemble your block arranged like this: (or get creative as come up with your own arrangement).
 When assembling watch your curves to make sure the seams meet – unlike mine which was put together after very little sleep and will need to be fixed! In the interest of getting this up you get to see my poorly matched seems.


